
Wake Up Your Garden: The Ultimate Guide to Nutrient-Rich Spring Growth
The Magic of the Spring Awakening
There is nothing quite like the first few weeks of spring. As the snow melts and the soil begins to warm, a quiet energy pulses through the garden. For gardeners, this is the most critical window of opportunity. To transform a sleepy backyard into a lush, vibrant oasis, understanding the nuances of fertilizing garden spring is essential. Think of your soil as a bank account; over the winter, and during the previous growing season, your plants have withdrawn many of the essential nutrients. Selecting the right spring plant fertilizer is like making a much-needed deposit, ensuring your flowers, vegetables, and shrubs have the literal “fuel” they need to explode into growth. In this guide, we will break down everything you need to know to feed your garden with confidence.
Understanding Your Garden’s Appetite
Before you grab a bag of nutrients, it is important to understand what you are trying to achieve. Plants don’t just need “food”; they need specific elements to perform different tasks. Most fertilizers are labeled with three numbers, known as the N-P-K ratio.
Decoding N-P-K
- Nitrogen (N): Promotes lush, green leaf growth. This is vital for lawns and leafy greens.
- Phosphorus (P): Focuses on root development and flower/fruit production.
- Potassium (K): Enhances overall plant health, disease resistance, and cold hardiness.
Organic vs. Synthetic Options
As a hobby gardener, you have two main choices. Organic fertilizers (like compost, bone meal, or fish emulsion) break down slowly over time, improving soil structure as they go. Synthetic fertilizers are man-made and provide an immediate “hit” of nutrients. For a long-term, sustainable garden, a focus on organic matter is usually the best approach for beginners.
Step-by-Step Instructions for Success
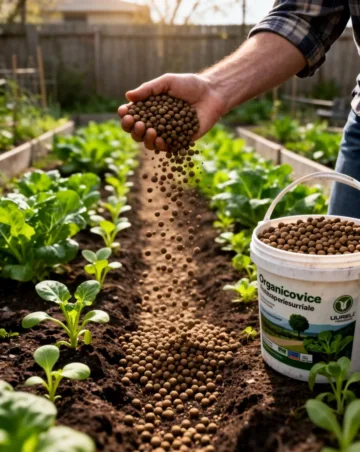
Timing and technique are just as important as the product you choose. Follow these steps to ensure you are fertilizing garden spring correctly without damaging your young plants. Using the right spring plant fertilizer at the right moment will make all the difference in your harvest later this year.
Step 1: Test Your Soil
Don’t guess—test! You can buy a simple pH and nutrient testing kit at any garden center. This tells you exactly what your soil is missing, so you don’t waste money on nutrients your garden already has in abundance.
Step 2: Clean the Beds
Remove any lingering winter debris, dead leaves, or stubborn weeds. You want your fertilizer to reach the soil surface directly, rather than getting caught in a layer of old mulch.
Step 3: Ease into Application
Wait until the soil is workable and no longer frozen or waterlogged. If the ground is too wet, the nutrients will simply wash away. Apply your chosen fertilizer according to the package instructions—more is not always better!
Step 4: Water it In
Unless you are using a liquid feed, most granular fertilizers need water to begin breaking down. A light watering after application helps the nutrients travel down to the root zone where they are needed most.
Tips from Experienced Gardeners
Over the years, I’ve learned that the small details often yield the biggest results. Here are a few “pro-level” tips for your spring routine:
- Wake up the microbes: If you use organic fertilizers, remember they rely on soil bacteria to work. These bacteria are most active when the soil temperature reaches about 50°F (10°C).
- The “Free” Fertilizer: Don’t overlook compost. Adding an inch of high-quality compost to your garden beds is often better than any store-bought chemical.
- Feeding the Perennials: Focus your efforts on the “heavy feeders” like roses, peonies, and hydrangeas. They will appreciate the extra boost as they push out new buds.
Common Mistakes to Avoid
Even seasoned gardeners can get a bit overzealous in the spring. Avoid these common pitfalls:
Over-fertilizing
Excessive nitrogen can lead to a massive flush of green leaves but zero flowers or fruit. In extreme cases, too much salt in the fertilizer can “burn” the plant roots, leading to yellowing or death.
Fertilizing Too Early
If you fertilize during a “false spring” (a warm week followed by a hard freeze), you might encourage tender new growth that will be killed by the returning frost. Wait until the threat of a hard freeze has passed.
Ignoring pH Levels
If your soil is too acidic or too alkaline, your plants physically cannot “unlock” the nutrients in the soil. Always ensure your pH is in the correct range (usually 6.0 to 7.0 for most vegetables) before adding more fertilizer.
Tools and Materials Needed
Having the right tools on hand makes the job much easier and ensures even distribution. You don’t need a professional shed, but these basics are helpful:
- Soil Test Kit: The most important tool in your arsenal.
- Hand Trowel or Garden Fork: For mixing compost or granular feed into the top inch of soil.
- Broadcast Spreader: Helpful if you are fertilizing a large lawn area.
- Watering Can or Hose: To activate the nutrients.
- Gardening Gloves: To protect your skin from concentrated minerals and organisms.
Seasonal and Climate Considerations
Depending on where you live, “spring” happens at different times. If you are in a southern climate with a short winter, you may need to fertilize as early as February. In northern climates, May might be your starting point.
Additionally, if you live in an area with heavy spring rains, consider using slow-release granules. These are designed to release nutrients over several months, ensuring that a single heavy downpour doesn’t wash your entire investment into the local storm drain.
Benefits of Spring Nutrition
Why put in all this effort? Proper spring feeding sets the stage for the entire year. It leads to:
- Stronger root systems that can survive summer droughts.
- Increased resistance to common garden pests and fungal diseases.
- Brighter, more abundant blooms on ornamental plants.
- Higher yields and better flavor in vegetable gardens.
Alternative Methods: Foliar Feeding and Tea
If you want to try something different from traditional granules, consider these methods:
Foliar Feeding
This involve spraying a diluted liquid fertilizer directly onto the leaves of the plant. Plants can actually absorb nutrients through their stomata (tiny pores). This is a great “quick fix” for plants showing signs of yellowing.
Compost Tea
By soaking high-quality compost in water for 24-48 hours, you create a nutrient-rich liquid. This “tea” is packed with beneficial microbes that invigorate the soil biology alongside providing nutrients.
Conclusion
Taking the time to focus on fertilizing garden spring is one of the most rewarding tasks you can undertake. By understanding your soil’s needs, choosing the right spring plant fertilizer, and applying it with care, you are giving your garden the best possible start. Remember, gardening is a marathon, not a sprint. Start with a soil test, feed your plants gently, and watch as your backyard transforms into a lush sanctuary. Happy gardening!
Frequently Asked Questions
1. Can I use the same fertilizer for my lawn and my flowers?
Technically yes, but it isn’t ideal. Lawns need very high nitrogen, while flowers need more phosphorus. Using lawn fertilizer on flowers might result in lots of leaves but very fewer blossoms.
2. How often should I fertilize in the spring?
For most garden beds, one solid application in early spring is enough. However, if you are growing vegetables or container plants, they may require follow-up feedings every 2 to 4 weeks throughout the growing season.
3. Should I fertilize my trees and shrubs?
Mature trees usually don’t need annual fertilizer if the soil is healthy. However, young trees and flowering shrubs like azaleas benefit greatly from a specialized spring feeding.
4. What happens if it rains right after I fertilize?
A light rain is perfect! However, if a torrential rainstorm occurs, much of the fertilizer may wash away before it can soak in. You may need to re-apply a smaller dose once the soil dries out a bit.
5. Is coffee grounds a good spring fertilizer?
Coffee grounds are a great source of nitrogen and organic matter. However, they should be composted first or used sparingly as a top dressing, as they can be acidic and can compact if applied too thickly.



