
From Tiny Pots to Big Plots: The Ultimate Guide to Successful Seedling Transition
The Art of Graduation Day for Your Plants
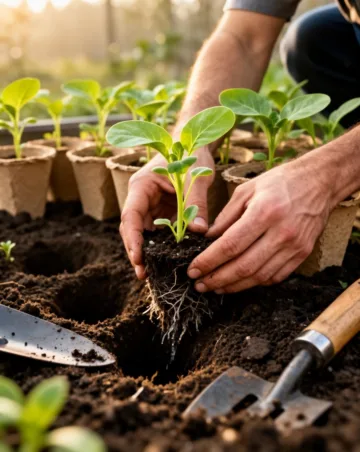
There is nothing quite as rewarding as watching those first tiny green specks poke through the soil in your indoor starter trays. You’ve nurtured them under grow lights, kept them hydrated, and celebrated every new leaf. However, the most critical phase of a plant’s early life is the transition from its protected nursery to the rugged reality of the open garden. To ensure your garden thrives, you must learn exactly how to transplant seedlings without causing them undue stress. This process isn’t just about digging a hole; it’s about timing, technique, and the delicate dance of moving seedlings outdoors so they can reach their full potential in the sun and wind.
Understanding the “Why” and “When” of Transplanting
The Biology of Transplant Shock
Plants are creatures of habit. When they grow in a controlled indoor environment, they develop “soft” tissues. Their stems haven’t had to fight the wind, and their leaves haven’t had to develop a thick waxy cuticle to protect against intense UV rays. If you move them too quickly, they experience “transplant shock,” a condition where the plant stops growing, wilts, or even dies because it cannot cope with the sudden change in environment. Successful gardening is about minimizing this shock through gradual exposure.
Signs Your Seedlings Are Ready
How do you know it’s time to move? Look for these three indicators:
- True Leaves: Wait until the plant has at least two sets of “true leaves” (the leaves that look like the adult plant), not just the initial seed leaves (cotyledons).
- Root Development: If you gently tip the plant out and see roots beginning to circle the bottom of the pot, it’s ready for more space.
- Size: Generally, most seedlings are ready when they are 3 to 4 inches tall, depending on the species.
The Essential Hardening Off Process
The Seven-Day Schedule
Hardening off is the most important step in moving seedlings outdoors. It is a week-long process of gradually introducing your plants to the elements.
- Day 1-2: Place seedlings in a shaded, sheltered spot for just 1–2 hours before bringing them back inside.
- Day 3-4: Increase time to 4 hours, allowing for a small amount of dappled sunlight.
- Day 5-6: Leave them out all day in a sunny spot, bringing them in only at night.
- Day 7: If the overnight temperatures are within the safe range for that specific plant, they can stay out overnight in their pots before being planted the next day.
Step-by-Step Instructions for Success
Preparing Your Garden Bed
Before you even touch your plants, ensure the soil in your garden is ready. Amend the earth with organic compost to provide a nutrient-rich home. Ensure the soil is moist but not soggy. A dry hole will pull moisture away from the seedling’s delicate root ball, causing immediate stress.
Executing the Move
When the weather is overcast or it is late afternoon, follow these steps to transplant seedlings safely:
- Water Well: Water your seedlings in their trays an hour before transplanting. Wet root balls stay together better than dry ones.
- Small Holes: Dig a hole in your garden bed slightly wider and deeper than the current container.
- Handle with Care: Never grab a seedling by its stem. If the stem snaps, the plant dies. Always handle them by the root ball or by the sturdy “true leaves” if necessary.
- The Perfect Depth: For most plants, plant them at the same depth they were in the pot. (Exceptions include tomatoes, which can be buried deeper).
- Firm and Water: Gently press the soil around the base to remove air pockets and water them immediately.
By following this method, you ensure that moving seedlings outdoors results in productive, healthy adult plants rather than wilted stalks.
Tips from Experienced Gardeners
Watch the Clouds
Veteran gardeners know that a cloudy, drizzly day is the “Goldilocks” weather for transplanting. The lack of intense sun prevents the leaves from transpiring too much moisture while the roots are trying to settle into their new home.
The Butter Knife Trick
If you are using plastic cell trays, use a dull butter knife or a popsicle stick to gently pry the root ball out. Pushing from the bottom can sometimes crush the roots, but “levering” them from the side is much gentler.
Use Seaweed Extract
Liquid seaweed fertilizer is a fantastic “tonic” for transplants. It contains hormones that encourage root growth rather than foliage growth, helping the plant establish its foundation quickly.
Common Mistakes to Avoid
Ignoring the Frost Date
The most common mistake is impatience. Even if the sun is shining, if the soil temperature hasn’t reached 60°F (15°C) for heat-loving plants like peppers, they will simply sit in the ground and stunt. Always check your local “last frost date.”
Root Disturbance
Some plants, like cucumbers, squash, and beans, have very sensitive taproots. They hate being moved. For these varieties, use biodegradable peat or paper pots that can be planted directly into the ground to avoid touching the roots at all.
Crowding the Space
It is tempting to plant seedlings close together because they look so small. However, lack of airflow leads to fungal diseases. Always follow the spacing recommendations on the seed packet to give your plants room to breathe.
Tools or Materials Needed
The Basic Kit
- Hand Trowel: A narrow trowel is better for precision work around small seedlings.
- Watering Can with a Rose: The “rose” (the perforated nozzle) breaks the water into a gentle spray so you don’t wash away the soil from the new roots.
- Garden Labels: Don’t assume you will remember what is what! Label every row immediately.
- Organic Compost: For backfilling holes and providing a nutrient boost.
Seasonal or Climate Considerations
Managing Extreme Heat
If you live in a climate where it goes from “cool” to “scorching” overnight, you may need to provide temporary shade. Use an old bedsheet or shade cloth propped up on stakes to protect your new transplants for the first three days.
The Rain Factor
While light rain is good, a heavy downpour can bury small seedlings under mud or wash them away entirely. If a storm is forecasted, wait a day or two until the weather calms down before planting.
Benefits of This Gardening Method
Earlier Harvests
By starting seeds indoors and then transplanting, you effectively extend your growing season by 4 to 8 weeks. This is essential for gardeners in northern climates who want to grow long-season crops like watermelon or large beefsteak tomatoes.
Better Survival Rates
Direct-sowing seeds in the garden leaves them vulnerable to birds, slugs, and drying out. Transplanting an established “teenager” plant gives it a massive head start and a much higher chance of surviving the “wilds” of the backyard.
Alternative Methods: Direct Sowing and Winter Sowing
Direct Sowing
For root crops like carrots and radishes, transplanting is not recommended. These should be sown directly where they are to grow. The “taproot” of a carrot cannot be disturbed without causing the vegetable to become misshapen.
Winter Sowing
This involve sowing seeds in milk jugs or containers left outside during the winter. The plants germinate naturally as the weather warms. These seedlings are inherently “hardy” and often require less time to acclimate than those grown under artificial lights.
Conclusion
Mastering the transition from indoor tray to outdoor soil is a rite of passage for every green thumb. When you take the time to transplant seedlings with patience and care, you are setting the stage for a bountiful harvest. Remember that the process of moving seedlings outdoors is a marathon, not a sprint. By prioritizing the hardening-off phase and handling those tender roots with the respect they deserve, you’ll transform those tiny green shoots into a flourishing, vibrant garden that will be the envy of the neighborhood.
Frequently Asked Questions
1. What do I do if my seedlings look wilted after transplanting?
Check the soil moisture first. If it’s wet, they are likely just experiencing temporary shock. Give them some shade and they should perk up in 24-48 hours. Do not add more fertilizer, as this can increase stress.
2. Can I transplant on a windy day?
It’s best to avoid it. High winds can cause “wind burn” and dry out the leaves since the roots aren’t yet established enough to replace the lost moisture. If you must plant, provide a temporary windbreak.
3. Should I remove the first flowers on my transplants?
Yes! If your peppers or tomatoes have flowers when you plant them, pinch them off. You want the plant to focus its energy on growing roots right now, not producing fruit.
4. How deep should I plant my seedlings?
For most plants, level with the soil surface. However, tomatoes can be buried up to their first set of leaves, as they will grow extra roots all along the buried stem, leading to a stronger plant.
5. Is it okay to use “potting mix” in the garden holes?
It’s better to use garden soil mixed with compost. Potting mix is very light and can dry out faster than the surrounding garden soil, creating a “wicking” effect that pulls water away from the plant.



