
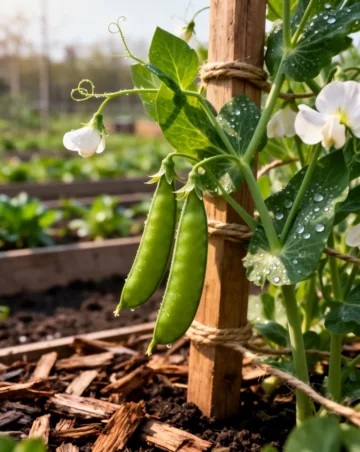
Title: The Ultimate Guide to Garden Peas: From Seed to Succulent Harvest
Why You Should Be Planting Peas This Season
There is a specific kind of magic that happens in the early spring garden. While most plants are still shivering in the dormant soil, the humble pea is ready to sprint. For many of us, the true start of the gardening season isn’t marked by the calendar, but by the day we tuck those wrinkled seeds into the earth. If you are looking for a rewarding, fast-growing, and delicious crop, growing peas is one of the most satisfying projects you can undertake. Whether you have a sprawling backyard or a few pots on a balcony, this pea planting guide will provide you with the blueprint for a crunchy, sweet harvest that puts grocery store varieties to shame.
Understanding the Three Main Types of Peas
Before you get your hands dirty, you need to decide which type of pea fits your palate and your garden space. Not all peas are created equal!
English Peas (Shelling Peas)
These are the classic peas where you discard the tough, fibrous pod and eat the tender green seeds inside. They require a bit more work in the kitchen, but the flavor of a freshly shelled English pea is incomparable. Look for varieties like ‘Little Marvel’ or ‘Green Arrow’.
Snow Peas
Commonly found in stir-fries, snow peas have flat pods and very small, undeveloped seeds. You eat the entire pod, which offers a delightful crunch and a mild sweetness. ‘Oregon Sugar Pod II’ is a fantastic, disease-resistant choice for beginners.
Sugar Snap Peas
The best of both worlds! Sugar snaps have thick, succulent pods and full-sized, sweet seeds inside. You eat the whole thing, pod and all. They are the ultimate garden snack. ‘Sugar Ann’ and ‘Super Sugar Snap’ are industry standards for a reason.
Choosing the Right Spot in Your Garden
Peas are relatively low-maintenance, but they do have a few “must-haves” regarding their environment.
Sunlight Requirements
Peas love full sun, meaning at least six to eight hours of direct sunlight a day. However, because they are cool-season crops, they can tolerate partial shade better than heat-loving plants like tomatoes. If your garden gets hit with intense afternoon heat, a bit of dappled shade can actually help extend your harvest.
Soil Quality and Drainage
Peas hate “wet feet.” They need well-draining soil rich in organic matter. If your soil is heavy clay, consider planting in raised beds or adding plenty of compost to loosen the texture. A slightly acidic to neutral pH (between 6.0 and 7.0) is ideal.
Step-by-Step Instructions for Success
Mastering the art of growing peas starts with timing and technique. Because peas are a cool-weather crop, you want to get them in the ground as soon as the soil can be worked in the spring—even if there is a threat of light frost. Follow this pea planting guide to ensure your seeds germinate and thrive:
- Prepare the seeds: To speed up germination, soak your pea seeds in a bowl of room-temperature water for 12 to 24 hours before planting. This softens the outer coating.
- Inoculate (Optional): Many gardeners use a rhizobial inoculant powder. This contains beneficial bacteria that help the pea roots “fix” nitrogen from the air into the soil. Simply roll your damp seeds in the powder before planting.
- Sowing: Plant seeds 1 inch deep and about 2 inches apart. If you are planting multiple rows, space the rows at least 12 to 18 inches apart.
- Support: Most peas are climbers. Install your trellis, netting, or “pea brush” (twiggy branches) at the time of planting so you don’t disturb the roots later.
- Watering: Water deeply immediately after planting. Keep the soil consistently moist but not soggy during the germination period, which usually takes 7 to 14 days.
Tips from Experienced Gardeners
Want to level up your pea game? Here are some “pro” secrets passed down through generations of horticulturalists:
Succession Planting
Peas have a relatively short harvest window. To keep the pods coming, plant a new batch every two weeks until the weather starts to warm up. This ensures you aren’t overwhelmed with 10 pounds of peas in one week and then none for the rest of the season.
Mulching to Keep Roots Cool
Once your seedlings are about 4 inches tall, apply a layer of clean straw or shredded leaves around the base. This mulch regulates soil temperature and keeps the roots cool, which is essential as the late spring sun begins to warm up.
Harvesting Frequently
The more you pick, the more the plant produces. Once the pods reach their desired size, harvest them daily. If you leave pods on the vine to get oversized and starchy, the plant will receive a signal that its job is done and it will stop producing new flowers.
Common Mistakes to Avoid
Planting Too Late
The biggest enemy of the pea is heat. If you wait until the weather is consistently in the 80s (Fahrenheit), your plants will likely wither or stop producing. If you miss the spring window, wait for the late summer to plant a fall crop.
Over-Fertilizing with Nitrogen
Peas are legumes, meaning they create their own nitrogen. If you give them a high-nitrogen fertilizer, you will end up with beautiful, lush green vines but very few actual pea pods. Focus on compost or a balanced, low-nitrogen fertilizer if needed.
Neglecting Vertical Support
Even “bush” varieties usually benefit from a little support. Without it, the vines sprawl on the ground, making the pods susceptible to rot, slugs, and soil-borne diseases. A simple piece of chicken wire works wonders.
Tools and Materials Needed
You don’t need a shed full of high-tech gear to grow great peas. Here is the basic kit:
- Quality Seeds: Choose a variety that suits your space (climbing vs. bush).
- Garden Trowel: For digging small trenches or holes.
- Trellis or Netting: For climbing varieties.
- Compost: To enrich the soil before planting.
- Garden Inoculant: To help with nitrogen fixation.
- Mulch: Straw or dried grass clippings (pesticide-free).
Seasonal and Climate Considerations
Peas thrive in temperatures between 45°F and 75°F (7°C to 24°C). In Northern climates, you can plant as early as March or April. In Southern climates, peas are often grown as a winter crop, planted in November or December to take advantage of the mild winters.
If you live in a region with a very short spring, look for “early” varieties that mature in 50 to 55 days. This gives you the best chance of harvesting before the summer heatwave arrives.
Benefits of Growing Your Own Peas
Why bother? First, the flavor: the sugars in peas begin turning to starch the moment they are picked. Store-bought peas can never match the candy-like sweetness of a pod picked and eaten right in the garden. Second, they are nutritional powerhouses, packed with vitamins A, C, and K, as well as fiber and protein. Finally, peas are “soil builders.” They improve the nitrogen levels in your garden soil, making the area more fertile for the next crop you plant there (like heavy-feeding kale or broccoli).
Alternative Methods: Container Gardening
Don’t have a backyard? No problem! Peas are excellent candidates for container gardening. Choose a pot that is at least 10 inches deep. Use a high-quality potting mix and select “dwarf” or “patio” varieties like ‘Tom Thumb’ or ‘Little Marvel’. You can stick a few bamboo stakes in the center of the pot and wrap twine around them to create a makeshift teepee for the vines to climb.
Conclusion
Whether you are a seasoned pro or a first-timer, growing peas is a delightful way to kick off the gardening year. By following this pea planting guide, you are setting yourself up for a season of healthy, crunchy, and vibrant harvests. Remember to plant early, provide a little support for those climbing tendrils, and keep the roots cool as the weather warms. There is nothing quite like the snap of a fresh pod in the morning sun—so get outside and start planting!
Frequently Asked Questions
1. How long does it take for peas to grow?
Most varieties take between 55 and 70 days from the time of planting to reach harvest. Snow peas are usually the fastest to mature.
2. Do I need to prune my pea plants?
No, pruning is generally not necessary for peas. Just let them climb and focus on picking the pods regularly to encourage more growth.
3. Can I grow peas indoors?
Peas need a lot of light and cool air, which can be hard to replicate indoors. While you can grow “pea shoots” (the young greens) on a sunny windowsill, growing them to full pod production is best done outdoors.
4. What should I plant after my peas are finished?
Since peas leave nitrogen in the soil, follow them with leafy greens like spinach, lettuce, or brassicas like broccoli and cabbage, which thrive on that extra nitrogen boost.
5. Why are the leaves on my pea plants turning white?
This is likely powdery mildew, a fungal disease that occurs during humid weather. To prevent it, ensure good airflow between plants and try to water at the base of the plant rather than over the leaves.



