
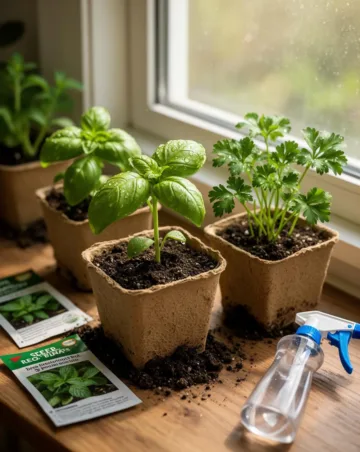
The Ultimate Guide to Starting Your Own Kitchen Herb Garden from Scratch
Welcome to the World of Homegrown Flavors
There is something incredibly therapeutic about pushing a tiny seed into moist soil and watching life emerge just a few days later. For many, the journey into herb gardening beginners often start with is driven by the desire for fresher ingredients in the kitchen. When you commit to growing herbs from seed, you aren’t just saving money at the grocery store; you are gaining access to hundreds of unique varieties that are rarely found on supermarket shelves. Whether you have a sprawling backyard or a sunny windowsill in a small apartment, starting herbs from scratch is one of the most rewarding projects you can undertake this season.
Choosing the Right Herbs for Your Space
The Easy Starters
If you are new to the hobby, start with herbs that germinate quickly and are relatively hardy. Basil is perhaps the most famous entry point for beginners. It sprouts within days and grows vigorously. Other great choices include cilantro, dill, and parsley. These “annuals” or “biennials” are designed by nature to grow fast, which provides that much-needed hit of dopamine for a new gardener.
The Patient Perennials
Perennial herbs like lavender, rosemary, and thyme are wonderful because they come back year after year. However, they can be a bit more stubborn when starting from seed. Rosemary, for instance, has a notoriously low germination rate and can take several weeks to sprout. If you choose these, don’t be discouraged by a slower pace.
Environmental Essentials: Light, Water, and Soil
The Power of Light
Most herbs are Mediterranean in origin, meaning they crave light. To succeed, you’ll need a spot that receives at least 6 to 8 hours of direct sunlight. If your windows aren’t bright enough, don’t worry—modern LED grow lights are incredibly affordable and can mimic the sun’s spectrum perfectly, allowing you to grow herbs in a basement or a dark kitchen.
The Foundation: Seed-Starting Mix
Never use garden soil from your backyard in small pots. It is too heavy and may contain pathogens or weed seeds. Instead, opt for a light, fluffy “seed-starting mix.” These are usually composed of peat moss or coconut coir and perlite. This medium allows delicate new roots to push through easily without resistance.
A Step-by-Step Guide to Sowing and Growing
Getting started doesn’t require a degree in botany. By following these steps for growing herbs from seed, you can ensure a high success rate. This process is the gold standard for herb gardening beginners who want to see consistent results.
Step 1: Preparation
Moisten your seed-starting mix in a bucket before putting it into your containers. It should feel like a wrung-out sponge—damp but not dripping. Fill your small pots or seed trays and press the soil down gently to remove large air pockets.
Step 2: Sowing the Seeds
Check your seed packet for the “planting depth.” A general rule of thumb is to plant a seed twice as deep as it is wide. For tiny seeds like oregano or mint, you simply sprinkle them on the surface and press them in lightly, as they often need light to germinate.
Step 3: Creating a Greenhouse Effect
Cover your pots with a clear plastic dome or a bit of plastic wrap. This traps humidity, which is vital for the seeds to soften their outer shells. Place the tray in a warm spot (on top of the refrigerator works well!).
Step 4: The Wait and the Light
Check your seeds daily. As soon as you see the first green “elbow” poking through the soil, remove the plastic cover immediately and move the tray into high light. If you leave the cover on too long, you risk “damping off,” a fungal disease that kills young seedlings.
Step 5: Thinning Your Seedlings
It feels cruel, but if you have three plants growing in a two-inch space, none of them will thrive. Use a pair of scissors to snip off the smallest seedlings, leaving only the strongest one in each pot.
Tips from Experienced Gardeners
Temperature Matters
While some herbs like cilantro prefer cooler weather, most culinary herbs are tropical at heart. Utilizing a waterproof seedling heat mat underneath your trays can speed up germination by several days. Keeping the soil consistently around 70-75°F (21-24°C) is the “sweet spot” for most varieties.
Bottom Watering
Instead of pouring water over the top of delicate seedlings, place your pots in a shallow tray of water for 10-15 minutes. This allows the soil to wick up moisture from the bottom, keeping the leaves dry and the roots hydrated without disturbing the seeds.
Common Mistakes to Avoid
Overwatering: The Silent Killer
The most common mistake beginners make is keeping the soil soggy. Roots need oxygen just as much as they need water. If the soil is always saturated, the roots will rot. Wait until the surface of the soil feels dry to the touch before watering again.
Planting Too Deeply
Small seeds carry a very limited amount of energy. If you bury a tiny mint seed an inch under the soil, it will run out of energy before it reaches the surface. Always check the packet—many herbs need to be “surface sown.”
Tools or Materials Needed
To get started effectively, you should gather the following items:
- High-quality organic herb seeds
- Seed-starting soil mix (peat-free options are available)
- Small pots, peat pellets, or recycled yogurt containers (with drainage holes!)
- A spray bottle for gentle misting
- Plant labels (you will forget what is what, trust me)
- A sunny windowsill or LED grow light
Seasonal or Climate Considerations
Indoor vs. Outdoor Timing
Most gardeners start their herb seeds indoors 6 to 8 weeks before the last frost date. This gives the plants a head start so they are robust enough to handle the transition to the garden. If you live in a very hot climate, you might actually grow herbs like cilantro and parsley in the autumn, as they tend to “bolt” (go to seed) and turn bitter in the summer heat.
Hardening Off
You cannot move a plant directly from a cozy indoor environment to the harsh outdoors. You must “harden them off” by placing them outside for one hour the first day, two hours the second, and gradually increasing their exposure to wind and sun over a week.
Benefits of Growing Your Own Herbs
Superior Flavor and Nutrition
The moment an herb is cut, it begins to lose its essential oils and vitamins. By growing your own, you can harvest exactly what you need seconds before it goes into your pan. The aromatic intensity of homegrown basil or thyme is incomparable to the wilted bundles found in plastic clamshells.
Pesticide-Free Peace of Mind
When you grow from seed, you have total control over what goes onto your food. You can choose organic fertilizers and avoid the synthetic pesticides often used in large-scale commercial herb production.
Alternative Methods: Cuttings and Division
While seeds are the most affordable method, some herbs are easier to grow from “cuttings.” If a friend has a healthy rosemary or mint plant, you can take a 4-inch snip, remove the bottom leaves, and place it in water. In a few weeks, roots will grow. Division is another method used for “clumping” herbs like chives; you simply dig up the plant and split the root ball in half with a shovel.
Conclusion
Embarking on the journey of growing herbs from seed is a fulfilling way to connect with nature and elevate your culinary skills. While it requires a bit of patience and attention to detail, the payoff is a kitchen full of vibrant, aromatic greenery. For herb gardening beginners, the key is to start small, stay observant, and not be afraid of a little trial and error. Before you know it, you’ll be simmering your own tomato sauce with basil you raised from a tiny speck, or brewing mint tea from your own backyard bounty.
Frequently Asked Questions (FAQs)
1. How long does it take for herb seeds to sprout?
Most common herbs like basil and dill sprout within 7 to 14 days. However, slower varieties like parsley or lavender can take up to 21 days or more. Always check your seed packet for specific timelines.
2. Do I need a greenhouse to grow herbs?
Not at all! A bright windowsill or a simple shelf with a shop light is more than enough for starting herbs indoors.
3. Can I use regular dirt from my garden?
It is not recommended for containers. Garden soil is too dense and doesn’t drain well enough for pots, which can lead to root rot. Stick to a dedicated potting or seed-starting mix.
4. When should I transplant my seedlings into bigger pots?
Once your seedling has at least two sets of “true leaves” (the leaves that look like the adult plant, not the initial sprout leaves), it is ready for a bigger home.
5. Why are my seedlings tall, skinny, and falling over?
This is called being “leggy.” It happens when the plants aren’t getting enough light and are stretching towards the source. Move them to a brighter spot or lower your grow light closer to the plants.



