
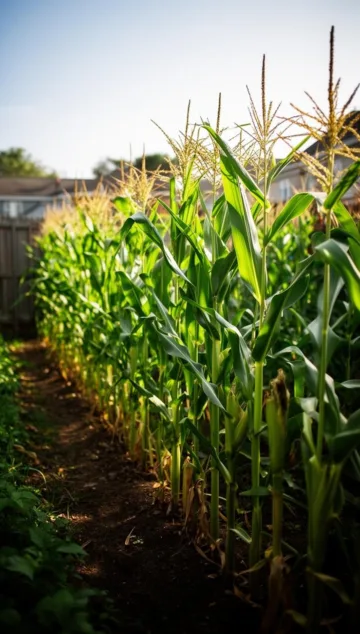
The Golden Harvest: A Beginner’s Guide to Homegrown Sweet Corn
There is a profound difference between the corn you buy at a grocery store and the ears you pluck directly from the stalk in your own garden. The moment corn is harvested, its natural sugars begin converting into starch. By learning how to grow corn backyard style, you ensure that the journey from soil to plate takes mere minutes, preserving that legendary sun-kissed sweetness. Whether you have a sprawling lawn or a modest raised bed, this corn planting guide will walk you through the rewarding process of cultivating your own summer bounty.
Understanding Corn Varieties
Standard Sweet (su)
These are the classic varieties our grandparents grew. They have a traditional corn flavor and texture but must be eaten almost immediately after harvest, as the sugar fades quickly. Silver Queen is a famous example of this type.
Sugar Enhanced (se)
A favorite for home gardeners, “se” varieties are more tender and sweeter than standard types. They stay sweet for a few days after picking, making them a bit more forgiving for the hobbyist gardener.
Supersweet (sh2)
These varieties are incredibly sweet and have a crisp, crunchy texture. However, they require warmer soil to germinate and must be isolated from other corn types to prevent cross-pollination, which can turn the kernels tough and starchy.
Site Selection and Soil Preparation
Sunlight Requirements
Corn is a sun-worshipper. To succeed, your patch needs at least 6 to 8 hours of direct, unobstructed sunlight every day. Avoid planting near tall trees or structures that might cast shadows during the peak growing hours.
Soil Quality and Drainage
Corn is a “heavy feeder,” meaning it requires a lot of nutrients from the soil. Use well-draining soil with a pH between 6.0 and 6.8. If your soil is heavy clay or too sandy, incorporating aged compost or well-rotted manure will improve the texture and nutrient profile significantly.
The Importance of Nitrogen
Because corn produces a massive amount of vegetation in a short time, it craves nitrogen. Preparing your bed with a nitrogen-rich organic fertilizer a week before planting gives the seedlings a strong head start.
The Secret to Pollination: Planting in Blocks
Why Rows Aren’t Always Best
Unlike many garden vegetables, corn is wind-pollinated. Pollen from the tassels at the top of the plant must fall onto the silks of the ears below. If you plant one long single row, the wind will likely blow the pollen away from the silks, resulting in “blank” ears with missing kernels.
The Block Method
Always plant corn in a block of at least three to four rows. For a small backyard, a 4×4 foot square is much more effective than a 16-foot single line. This configuration creates a “pollen cloud” that ensures almost every silk is fertilized.
Step-by-Step Instructions for Success
Ready to get your hands dirty? Follow these steps to grow corn backyard crops that will be the envy of the neighborhood. This corn planting guide simplifies the process into manageable actions:
Step 1: Timing is Everything
Wait until the soil temperature reaches at least 60°F (15°C). For supersweet varieties, wait for 70°F. Planting too early in cold, wet soil often leads to seed rot.
Step 2: Sowing the Seeds
Plant seeds about 1 to 1.5 inches deep. Space the seeds about 4 to 6 inches apart within the rows. Once the plants are about 4 inches tall, thin them so they are 12 inches apart. This ensures every plant has enough elbow room and resources.
Step 3: Maintaining Moisture
Corn has shallow roots and can dry out quickly. Provide about 1 inch of water per week, increasing this to 2 inches during the heat of summer and when the tassels appear. Mulching with straw or dried grass clippings can help retain soil moisture.
Step 4: Side-Dressing
When the corn is about knee-high, apply a high-nitrogen fertilizer (like blood meal or a balanced organic liquid feed) alongside the rows. This “side-dressing” provides the energy boost needed for the final push toward ear production.
Tips from Experienced Gardeners
Intercropping with the Three Sisters
Many experienced growers use the “Three Sisters” method: planting corn, beans, and squash together. The corn provides a ladder for the beans to climb, the beans fix nitrogen in the soil, and the large squash leaves act as a living mulch to keep the soil cool and suppress weeds.
Succession Planting
To avoid having 50 ears of corn ready on the exact same day, try succession planting. Plant a small block every two weeks, or plant varieties with different “days to maturity.” This extends your harvest from a single week to a full month.
Common Mistakes to Avoid
Under-Watering During Silking
The most critical time for water is when the silks emerge. If the plant is stressed now, the kernels won’t develop fully. Ensure the soil stays consistently moist during this two-week window.
Neglecting the Weeds
Because corn has shallow roots, it doesn’t like to compete with weeds for water or nutrients. However, be careful when hoeing near the base of the plants so you don’t damage the roots. Hand-pulling weeds is often the safest bet.
Planting Different Varieties Too Close
If you want to grow a sweet variety and a popcorn variety, keep them at least 25 feet apart (or plant them so they silk at different times). Cross-pollination between different types of corn usually results in poor-tasting, starchy kernels.
Tools and Materials Needed
- High-Quality Seeds: Choose a variety suited for your climate zone.
- Garden Hoe: For creating furrows and light weeding.
- Compost or Aged Manure: To enrich the soil before planting.
- Nitrogen-Rich Fertilizer: For mid-season feeding.
- Soaker Hose: The most efficient way to water the roots without getting the foliage overly wet.
- Mulch: Straw or untreated wood chips to preserve moisture.
Seasonal and Climate Considerations
Short-Season Climates
If you live in the North where summers are short, look for “early” varieties that mature in 60 to 70 days. You can also start seeds indoors in biodegradable peat pots, but be extremely gentle—corn does not like its roots disturbed during transplanting.
Hot, Arid Climates
In very hot regions, corn may struggle with pollination if temperatures exceed 95°F for several days. In these areas, try to time your planting so the corn silks before the peak heat of July, or provide midday shade using a light row cover.
Benefits of Growing Your Own Corn
Beyond the superior taste, growing corn at home allows you to control exactly what goes into your food. You can choose organic methods and avoid the synthetic pesticides often used in commercial corn production. Additionally, the stalks themselves can be repurposed. Once the harvest is over, dried corn stalks make wonderful autumn decorations or can be shredded and added to your compost pile to create “brown” carbon-rich material for next year’s garden.
Alternative Methods: Raised Beds and Containers
Raised Bed Gardening
Growing corn in raised beds is actually very effective. Because the soil in a raised bed warms up faster in the spring, you can often get your seeds in the ground a week or two earlier. Just ensure the bed is deep enough (at least 12 inches) to support the tall stalks.
Can You Grow Corn in Containers?
While not traditional, it is possible. Use a large container (at least 10-15 gallons) and plant 3 to 4 stalks in a cluster. You will need to be extremely diligent with watering and fertilizing, as containers dry out and lose nutrients rapidly. Look for “dwarf” varieties specifically bred for smaller spaces.
Conclusion
Growing your own sweet corn is one of the most satisfying projects a gardener can undertake. While it requires a bit more space and nutritional attention than a pot of herbs, the reward of biting into a juicy, sun-warmed ear of corn is unmatched. By following this corn planting guide and focusing on the block-planting method, you can successfully grow corn backyard harvests that provide a true taste of summer. Remember to keep the soil rich, the water flowing, and the weeds at bay, and you will be well on your way to a legendary harvest.
Frequently Asked Questions
1. How do I know when the corn is ready to pick?
Check the ears when the silks turn dark brown and dry. Squeeze the ear; it should feel firm and full. You can peel back a tiny bit of the husk and pierce a kernel with your fingernail—if a milky liquid squirts out, it’s perfect. If the liquid is clear, it’s too early; if it’s thick/pasty, it’s overripe.
2. Why are my corn ears missing kernels?
Poor pollination is usually the culprit. This happens if the corn was planted in a single row rather than a block, or if there was an extreme heatwave/drought during the silking stage. You can hand-pollinate by shaking the tassels over the silks to help the process along.
3. Do I need to remove the “suckers” (side shoots) at the base?
No, you don’t need to remove them. Old gardening myths suggested they took energy away from the main ear, but modern research shows these leaves actually contribute more energy to the plant. Leaving them alone is actually better for the corn.
4. What pests should I watch out for?
Corn earworms are common. You can deter them by applying a drop of mineral oil to the silks as soon as they appear. Also, keep an eye out for raccoons—they love sweet corn as much as humans do! Sturdy fencing or motion-activated lights can help keep them away.
5. Can I save seeds from this year to plant next year?
If you are growing an “F1 Hybrid” (most modern sweet corns), the seeds won’t grow “true to type” next year. If you want to save seeds, you must plant “Heirloom” or “Open-Pollinated” varieties and ensure they haven’t cross-pollinated with other types.



