
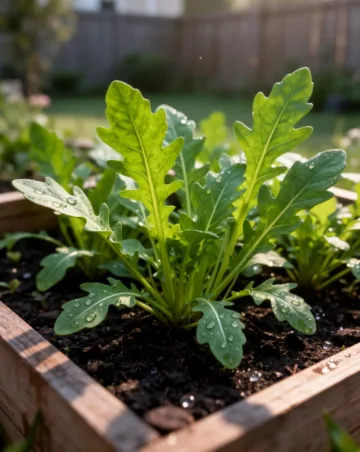
The Peppery Powerhouse: A Comprehensive Guide to Success with Arugula
Why Arugula Deserves a Spot in Your Garden
If you are looking for a quick win in your vegetable patch, you need to learn how to grow arugula. Often referred to as “rocket” due to its incredible growth speed, this leafy green is a favorite among chefs and home cooks for its distinct, peppery bite. Whether you have a sprawling backyard or a sunny balcony with space for a few pots, this resilient herb-like green is one of the most rewarding crops for beginners.
Starting your journey is easier than you might think, especially when you follow a structured arugula planting guide. Unlike fussy high-maintenance vegetables, arugula is remarkably hardy and flourishes in the cooler temperatures of spring and fall. In this guide, we will walk through everything from soil preparation to the final harvest, ensuring you have a steady supply of fresh, zesty greens for your salads, pizzas, and pestos.
Understanding Arugula: Varieties and Characteristics
Standard Wild Arugula vs. Garden Arugula
Not all arugula is created equal. The most common variety found in nurseries is Eruca vesicaria, or Garden Arugula. It features broad, rounded leaves and a milder flavor. Conversely, Wild Arugula (Diplotaxis tenuifolia) has deeply lobed, thin leaves and a much more intense, spicy kick. Deciding which one to plant depends entirely on your palate.
Days to Maturity
One of the best things about this crop is the instant gratification. Most varieties are ready to harvest as baby greens in as little as 20 to 25 days. If you prefer full-sized leaves, you only need to wait about 40 to 45 days. This rapid lifecycle makes it perfect for succession planting.
Ideal Growing Conditions
Sunlight Requirements
Arugula loves the sun, but it isn’t a fan of intense heat. In the cool spring or fall, provide it with full sun (6-8 hours). However, if you are planting as the weather warms up, it will actually benefit from partial shade, which helps prevent the plant from “bolting” or going to seed prematurely.
Soil and pH Preferences
Arugula isn’t overly picky, but it thrives in well-draining soil rich in organic matter. Aim for a soil pH between 6.0 and 7.0. Adding a bit of compost before planting will provide the nitrogen boost these leafy greens crave.
Step-by-Step Instructions for Success
To successfully grow arugula, the timing of your sowing is the most critical factor. Because these plants thrive in the “shoulder seasons,” you should aim to get seeds in the ground as soon as the soil can be worked in the spring, or late in the summer for a fall harvest.
Follow this arugula planting guide for the best results:
- Prepare the Bed: Loosen the top 6 inches of soil and mix in an inch of aged compost. Smooth the surface with a rake.
- Sow the Seeds: Arugula seeds are tiny. Sow them about 1/4 inch deep. If planting in rows, space the rows 10 inches apart. You can also “broadcast” sow by scattering seeds evenly over an area for a dense patch of greens.
- Water Gently: Use a fine mist setting on your hose to avoid washing the small seeds away. Keep the soil consistently moist until germination, which usually happens within 5 to 10 days.
- Thinning: Once seedlings are about 2 inches tall, thin them so there is 3 to 4 inches of space between plants. This allows for better airflow and larger leaf development.
- Succession Sowing: To ensure a continuous harvest, plant a new narrow row of seeds every two weeks until the heat of summer arrives.
Tips from Experienced Gardeners
The Secret of Mulching
Experienced gardeners know that arugula roots are relatively shallow. Applying a thin layer of clean straw or shredded leaves around the base of the plants helps retain moisture and keeps the roots cool. This can extend your harvest window by a week or two when a surprise heatwave hits.
Harvesting Techniques
Don’t wait for the plant to get huge. The flavor is best when the leaves are between 3 and 6 inches long. Use the “cut and come again” method: harvest the outer leaves with scissors, leaving the inner heart intact. The plant will continue to push out new growth for several weeks.
Common Mistakes to Avoid
Letting the Soil Dry Out
Leafy greens like arugula are composed mostly of water. If the soil dries out completely, the plant enters “stress mode.” This usually results in extremely spicy, almost bitter leaves that are tough to eat. Keep the soil like a wrung-out sponge.
Planting Too Late in Spring
If you wait until the thermometer hits 80°F (27°C) to plant, your arugula will likely bolt immediately. Bolting is when the plant sends up a flower stalk; once this happens, the leaves become bitter and the plant stops producing foliage. Always aim for those cool transition months.
Tools or Materials Needed
To get started, you won’t need a shed full of expensive equipment. Here is the basic kit:
- High-quality Arugula Seeds: Look for “Slow Bolt” varieties if you live in a warmer climate.
- Hand Trowel: For prepping the soil and thinning seedlings.
- Compost: Organic matter is the best fuel for leafy growth.
- Watering Can with a Rose Head: This ensures a gentle spray that won’t disturb seeds.
- Garden Scissors: For clean harvests that don’t damage the plant’s crown.
Seasonal or Climate Considerations
Spring vs. Fall Planting
While spring planting is traditional, many horticulture experts argue that fall-grown arugula is superior. As the temperatures drop in autumn, the plant produces sugars to protect itself from frost, resulting in a sweeter, more nuanced flavor. Arugula can even survive a light frost, making it a great “last crop” of the year.
Winter Growing
If you have a cold frame or a row cover, you can often grow arugula well into the winter months in Zone 6 or higher. Its natural frost tolerance makes it one of the easiest vegetables to “overwinter” for early spring salads.
Benefits of Growing Arugula
Nutritional Powerhouse
Arugula is incredibly low in calories but high in vitamins A, K, and C. It is also a good source of calcium and potassium. Growing your own ensures you get these nutrients at their peak, as store-bought greens lose nutritional value during transport.
Pest Management
Believe it or not, the spicy oils in arugula act as a minor natural deterrent for some garden pests. While flea beetles may still take a nibble, many soft-bodied insects find the peppery taste unappealing. It’s a great companion plant for slower-growing vegetables like carrots.
Alternative Methods: Containers and Hydroponics
Container Gardening
You don’t need a backyard to enjoy home-grown greens. Arugula has a shallow root system, making it perfect for shallow pots or window boxes. Use a high-quality potting mix and ensure the container has drainage holes. Container-grown arugula is also easier to move into the shade if the sun gets too hot.
Hydroponic Growing
Because it grows so fast, arugula is a top choice for indoor hydroponic systems. Whether you use a simple Kratky jar or a sophisticated Aerogarden, you can enjoy fresh pepper greens in the middle of a blizzard.
Conclusion
Learning how to grow arugula is a rite of passage for any home gardener looking to increase their self-sufficiency. It is a crop that gives much more than it takes, offering a high-yield, high-flavor return for very little effort. By following this arugula planting guide and focusing on cool-weather sowing, consistent moisture, and timely harvesting, you can transform your garden into a gourmet salad bar.
Remember to start early, harvest often, and don’t be afraid to experiment with different varieties to find the spice level that suits your kitchen. Happy gardening!
Frequently Asked Questions
1. Why does my arugula taste so bitter?
Bitterness is usually caused by heat stress or the plant beginning to bolt. When the weather gets hot, the plant produces chemical compounds that make the leaves unpalatable. To avoid this, grow in the cool season or provide afternoon shade.
2. What are the tiny holes in my arugula leaves?
Small “shotholes” are typically caused by flea beetles. While unsightly, the leaves are still edible. You can prevent this by using a lightweight floating row cover immediately after sowing to keep the beetles off the plants.
3. Can I eat the flowers?
Yes! Arugula flowers are completely edible and have a mild, peppery flavor similar to the leaves. They make a beautiful and tasty garnish for salads once the plant has finished its leaf-production cycle.
4. How long does arugula stay fresh after harvesting?
Freshly harvested arugula will stay crisp in the refrigerator for about 5 to 7 days. For best results, wash the leaves in cold water, pat them completely dry, and store them in a perforated plastic bag with a paper towel to absorb excess moisture.
5. Does arugula grow back after you cut it?
Yes, if you use the “cut and come again” method. If you leave the center of the plant (the growing point) and about an inch of stem above the soil, the plant will regenerate new leaves for 2 or 3 subsequent harvests.



