
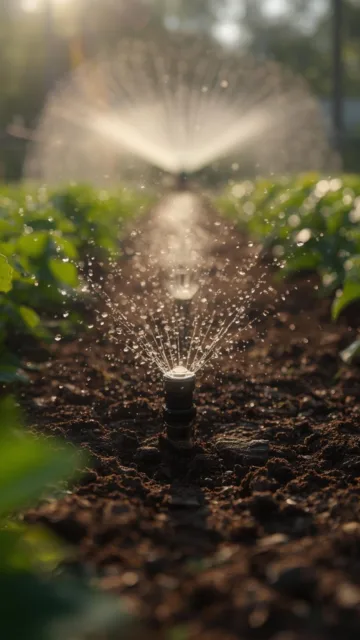
The Ultimate Guide to Effortless Watering: Master Your Garden with Precision
If you’ve ever spent a sweltering July afternoon hauling a heavy hose around your backyard, you know that watering can feel more like a chore than a hobby. Maintaining a lush, vibrant space requires consistency, but life often gets in the way. This is where a drip irrigation garden becomes a game-changer for the modern hobbyist. By delivering water directly to the roots of your plants, you not only save time but also ensure your greenery thrives during the hottest months. Setting up an efficient irrigation system garden layout allows you to automate your tasks while significantly reducing water waste, making your gardening journey both sustainable and stress-free.
Why Choose Drip Irrigation Over Traditional Watering?
Maximum Efficiency for Busy Gardeners
Standard sprinklers often lose up to 50% of their water to evaporation and wind. Drip systems, however, operate at low pressure and release water slowly. This precision ensures that the moisture penetrates deep into the soil where it is needed most, rather than sitting on leaves where it can promote fungal diseases.
Significant Water Savings
For those living in drought-prone areas or anyone looking to lower their utility bills, this method is unrivaled. Because you are targeting specific plants rather than watering the entire soil surface, you eliminate the runoff that typically occurs with high-flow hoses.
Understanding the Components of Your System
The Essential Parts of a Drip Setup
Before you start digging, it is helpful to understand the “skeleton” of your setup. Most systems are comprised of a few key parts that work in harmony to keep your plants hydrated.
The Mainline and Sub-mains
This is the “artery” of your system. Usually made of 1/2-inch poly tubing, these pipes transport water from your outdoor faucet to the various sections of your garden beds.
Emitters and Micro-tubing
Emitters are small devices that control how much water is released. You can choose from pressure-compensating emitters, which provide a steady flow even on sloped land, or adjustable bubblers for larger shrubs. Micro-tubing (usually 1/4-inch) branches off the mainline to reach individual pots or specific plants.
Filters and Pressure Regulators
Because drip systems use small openings, they can easily clog with sediment. A filter is a non-negotiable component. Similarly, a pressure regulator is essential because home water pressure is often too high for delicate drip lines, which can lead to “blowouts” or leaking connections.
Step-by-Step Instructions for Your Installation
To get your drip irrigation garden up and running, follow these practical steps. Planning is the most important part of the process, so grab a notebook and sketch out your yard before buying your materials. A well-thought-out irrigation system garden will save you hours of troubleshooting later.
Step 1: Map Your Zones
Group your plants by their water needs. For example, succulents should not be on the same line as thirsty tomatoes. Label these as “Zone A,” “Zone B,” etc.
Step 2: Connect to the Water Source
Attach a backflow preventer to your faucet to ensure garden water doesn’t flow back into your drinking supply. Follow this with a timer, a filter, and finally, the pressure regulator.
Step 3: Lay the Mainline
Run your 1/2-inch tubing along the length of your garden beds. Use “U-shaped” landscape staples to hold the tubing firmly against the ground. If you have a path to cross, you can bury the tubing a few inches deep.
Step 4: Install Your Emitters
Use a hole-punch tool specifically designed for irrigation tubing to create openings in the mainline. Snap your emitters directly into the line, or use 1/4-inch micro-tubing to reach plants that are further away from the main pipe.
Step 5: Flush and Cap
Before you put the end caps on your lines, turn the water on for a minute to flush out any dirt or plastic shavings. Once the water runs clear, slide on the end clamps to seal the system.
Step 6: Test and Adjust
Turn on the timer and watch each emitter. Ensure there are no leaks at the connections and adjust the flow if some plants are getting too much or too little water.
Tips from Experienced Gardeners
Mulch is Your Best Friend
Once your lines are laid, cover them with 2 to 3 inches of organic mulch like wood chips or straw. This protects the plastic tubing from UV damage and further reduces evaporation, keeping the soil cool and moist.
Color-Code Your Emitters
Many manufacturers color-code emitters by their flow rate (e.g., 0.5 gallons per hour vs. 2.0 gallons per hour). Keep a small cheat sheet in your shed so you know exactly which color belongs to which plant type.
Common Mistakes to Avoid
Over-tightening Connections
Plastic threads are easy to strip. Hand-tightening is usually sufficient for most garden connectors. If you have a minor leak, use a bit of plumber’s tape rather than cranking down with a wrench.
Mixing Different Brands
While many parts are universal, some tubing diameters vary slightly between brands. Try to stick to one ecosystem (like Rain Bird, Orbit, or Dig) for your connectors and emitters to ensure a watertight fit.
Ignoring the Filter
Even if your city water seems clean, tiny particulates can accumulate over time. Cleaning or replacing your filter once a season is much easier than replacing twenty clogged emitters.
Tools and Materials Needed
Your Shopping List
- Automatic Timer: To handle the watering while you sleep or vacation.
- Backflow Preventer: For safety and local code compliance.
- Pressure Regulator: Typically 25 PSI is the “sweet spot” for drip systems.
- 1/2-inch Poly Tubing: The main delivery line.
- 1/4-inch Vinyl Micro-tubing: For reaching individual plants.
- Assorted Emitters: 1 GPH (gallons per hour) for most perennials; 2 GPH for larger shrubs.
- Hole Punch Tool: For piercing the mainline.
- Goof Plugs: These are tiny plastic plugs used to seal holes if you make a mistake or move a plant.
Seasonal and Climate Considerations
Winterizing Your System
In colder climates, water left in the lines can freeze and crack the plastic. In the autumn, remove the timer and batteries to store them indoors. Use an air compressor or simply open the end caps to drain as much water as possible from the lines.
Adjusting for Summer Heat Waves
During extreme heat, don’t necessarily increase the time the system runs; instead, consider adding an extra watering cycle in the early morning. Watering at 5:00 AM allows the plants to hydrate before the midday sun hits.
Benefits of This Gardening Method
Healthier Plants, Fewer Weeds
Because water is delivered in a localized area, weeds in the surrounding dry soil are less likely to germinate. Furthermore, keeping the foliage dry reduces the risk of powdery mildew and leaf spot, which are common when using overhead sprinklers.
Customizable Growth
You can easily tailor your watering to the life cycle of the plant. Tomatoes, for instance, need heavy water while fruit is setting but benefit from less water as they ripen to concentrate flavors. With a drip system, you just swap an emitter to change the flow rate.
Alternative Methods
Soaker Hoses vs. Drip Systems
Soaker hoses are porous pipes that “sweat” water along their entire length. While cheaper and easier to install, they are less precise and tend to degrade faster than poly tubing. They are best for dense flower beds or rows of vegetables like carrots.
Self-Watering Containers
For balcony gardeners, self-watering pots with built-in reservoirs are a great alternative. However, these can still be integrated into a larger drip system using micro-emitters for a truly “hands-off” experience.
Final Thoughts on Your New Setup
Transitioning to a drip irrigation garden is one of the most rewarding upgrades you can make to your outdoor space. It represents a shift from “working for your garden” to “letting your garden work for you.” By taking the time to install a high-quality irrigation system garden, you are investing in the long-term health of your soil and plants. Whether you are growing prize-winning roses or a humble patch of lettuce, the consistency provided by drip technology will yield impressive results season after season.
Frequently Asked Questions
How long should I run my drip system?
Most gardens thrive with 30 to 60 minutes of watering two or three times a week. However, this depends on your soil type (clay holds water longer than sand) and the weather.
Can I use a drip system for potted plants?
Absolutely! Drip irrigation is ideal for containers, which dry out faster than the ground. Use 1/4-inch tubing to run “spaghetti lines” from your main pipe into each pot.
Is drip irrigation expensive to install?
A basic starter kit for a small garden bed usually costs between $30 and $60. While the upfront cost is higher than a simple garden hose, the savings in water and plant replacement costs usually pay for the system within one or two seasons.
Will my emitters get clogged by hard water?
Mineral buildup can happen. If you notice a drop in flow, you can soak the emitters in a vinegar solution to dissolve the calcium deposits.
Can I add fertilizer through my drip system?
Yes, this is called “fertigation.” You can installment an injector device near your water source that mixes liquid fertilizer into the water as it flows through the system.



