
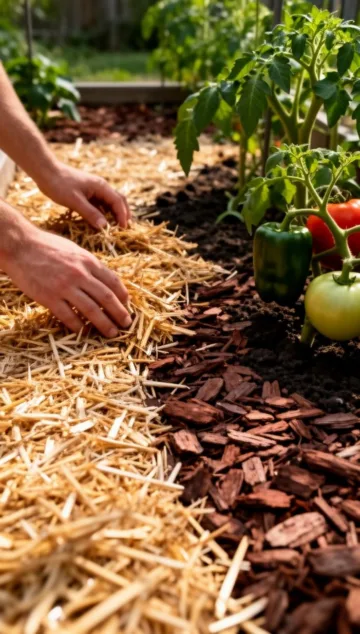
The Ultimate Guide to Mastering Your Soil: How to Mulch Like a Pro
Every gardener dreams of a lush, vibrant landscape where plants thrive with minimal effort. While we often focus on the newest fertilizers or high-tech irrigation systems, one of the most transformative secrets to a healthy backyard is actually quite simple and grounded: mulching. Whether you are battling stubborn weeds, trying to conserve water during a scorching summer, or looking to improve your soil’s long-term health, understanding the best garden mulching tips can change your gardening game forever. Beyond just making your flower beds look tidy and professional, the wide array of mulch garden benefits ensures that your plants stay resilient against pests, diseases, and extreme weather changes. In this guide, we will dive deep into everything you need to know to give your garden the protective blanket it deserves.
Understanding the Basics: What is Mulch?
At its simplest, mulch is any material spread over the surface of the soil. It acts as a protective layer, mimicking the natural floor of a forest where fallen leaves and organic debris create a nutrient-rich cycle. In a home garden, we use mulch to regulate temperature and keep moisture where it belongs—near the roots.
Organic vs. Inorganic Mulch
There are two main categories of mulch you can choose from. Organic mulches include materials that were once alive, such as wood chips, straw, pine needles, or compost. These are highly prized because they break down over time, adding valuable organic matter back into the earth. Inorganic mulches, like gravel, river rocks, or landscape fabric, don’t decompose. These are excellent for permanent pathways or aesthetic designs but don’t feed the soil.
Choosing the Right Material for Your Plants
The “best” mulch depends entirely on what you are growing. Vegetable gardens often thrive with clean straw or shredded leaves, which decompose quickly and are easy to move around during planting. For permanent shrub borders or fruit trees, heavier wood chips or bark nuggets are ideal because they last longer and provide a sturdy barrier against weeds.
The Golden Rules for Application: Step-by-Step Instructions
Applying mulch might seem as easy as dumping a bag of wood chips on the ground, but there is a science to doing it right. If applied incorrectly, you can actually suffocate your plants or invite rot. Following these precise garden mulching tips will ensure you maximize the mulch garden benefits without causing unintended harm to your precious perennials.
Step 1: Clean the Area
Before you lay down a single handful of mulch, you must clear the area. Pull existing weeds by the root. If you mulch over established weeds, they will simply grow through the layer, making them harder to remove later. This is also a great time to ensure your soil is slightly damp, as applying mulch over bone-dry soil can sometimes prevent light rain from reaching the roots.
Step 2: Layer Thickness Matters
A common mistake is applying mulch too thin or too thick. Aim for a depth of 2 to 4 inches. If the layer is thinner than 2 inches, light can still reach weed seeds, and moisture will evaporate quickly. If it is thicker than 4 inches, oxygen may have trouble reaching the soil, potentially “smothering” the beneficial microbes that keep your plants healthy.
Step 3: The “Donut” Method
Never pile mulch up against the trunks of trees or the stems of plants—this is often called “volcano mulching” and it is a major gardening faux pas. Instead, create a “donut” shape. Leave a gap of 2 to 3 inches between the mulch and the base of the plant. This prevents moisture from being trapped against the bark, which can lead to fungal infections and rot.
Step 4: Smooth and Water
Use a garden rake to level the mulch for a neat appearance. Once finished, give the area a light watering. This helps settle the mulch in place so it doesn’t blow away in the wind and initiates the process of locking in the soil’s existing moisture.
Tips from Experienced Gardeners
Veteran horticulturists often have a few “tricks of the trade” that save time and money. Here are some of the best-kept secrets from the greenhouse:
- Use What You Have: Don’t spend a fortune on bagged mulch if you have a large lawn. Grass clippings (as long as they haven’t been treated with herbicides) make an excellent, nitrogen-rich mulch for vegetable patches.
- The Newspaper Trick: If you are starting a new bed in a particularly weedy area, lay down two or three layers of non-glossy newspaper or plain brown cardboard before adding your mulch. This creates an extra biodegradable barrier that kills weeds effectively.
- Check for “Sour” Mulch: If you buy wood chips and they smell like vinegar or rotten eggs, they have likely fermented in the bag. Spread them out in the sun for a few days to air out before putting them near your plants, as the acidity can burn tender leaves.
Common Mistakes to Avoid
Even seasoned gardeners can fall into traps. Be mindful of these frequent errors:
Over-Mulching Every Year
You don’t always need to add a full 3 inches every spring. If last year’s mulch is still there, just top it off with an inch to refresh the color and depth. Piling layer upon layer over several years creates a crust that water cannot penetrate.
Using Chemically Treated Wood
Be cautious with free wood chips from industrial sources. They may contain dyes, chemicals, or pressure-treated remains that are not safe for food-producing gardens. Stick to natural, untreated cedar, pine, or hardwood when possible.
Tools and Materials Needed
To get the job done efficiently, gather these items before you start:
- Garden Rake: To spread and level the material.
- Wheelbarrow: For transporting bulk mulch around the yard.
- Pitchfork or Shovel: A pitchfork works best for woody mulch, while a shovel is better for fine compost or soil.
- Work Gloves: To protect your hands from splinters and potential hides in the piles (like spiders or thorns).
- Edges: A spade can be used to cut a clean edge around your beds, which helps keep the mulch contained.
Seasonal or Climate Considerations
The timing of your mulching is just as important as the material. In the Spring, wait until the soil has warmed up a bit. If you mulch too early while the ground is still frozen, you can actually trap the cold in, delaying your plants’ wake-up call. In Winter, mulching acts as an insulator. After the first hard frost, apply a layer to protect shallow-rooted plants from the “heaving” cycle of freezing and thawing, which can push plants out of the ground.
Benefits of This Gardening Method
Why do we emphasize the importance of this practice so much? The advantages are nearly endless. Mulching is a multi-tasking powerhouse for your landscape:
- Water Conservation: It can reduce water evaporation by as much as 35%, meaning you spend less time with the hose.
- Soil Enrichment: As organic mulch decays, it turns into humus, improving soil structure and drainage.
- Erosion Control: It prevents heavy rain from washing away your topsoil.
- Aesthetic Appeal: A freshly mulched garden immediately looks “finished” and intentional.
Alternative Methods
If traditional wood chips aren’t your style, consider these alternatives:
- Living Mulch: Plant low-growing groundcovers like creeping thyme or clover. These “living mulches” cover the soil and provide the same benefits while adding more flowers to your yard.
- Leaf Mold: Instead of raking and bagging leaves in the fall, shred them with your mower and let them rot into a dark, crumbly “leaf mold.” It’s one of the best free soil conditioners available.
- Pine Straw: Particularly popular in the southern regions, pine needles are lightweight and slightly acidic, making them perfect for acid-loving plants like azaleas and blueberries.
Conclusion
Taking the time to care for your soil is one of the most rewarding investments you can make in your home landscape. By implementing these garden mulching tips, you are setting your plants up for legendary success, ensuring they have the moisture, temperature stability, and nutrients they need to flourish season after season. Remember that gardening is an ongoing journey of learning and adapting to your specific environment. When you embrace the many mulch garden benefits, you aren’t just decorating your yard; you are building a healthy ecosystem from the ground up. So, grab your shovel, pick your favorite organic material, and give your garden the protection and nourishment it deserves today!
Frequently Asked Questions
1. How often should I replace my mulch?
Most organic mulches, like shredded hardwood, should be refreshed or topped off once a year, usually in the spring. More durable materials like bark nuggets may last two or three years before they need replacing.
2. Can mulch attract termites or pests?
While mulch provides moisture that some insects like, it rarely “attracts” termites to your home. However, to stay safe, keep mulch at least 6 to 12 inches away from your home’s foundation and siding to prevent a bridge for pests to enter.
3. Is it okay to use dyed mulch (red, black, or brown)?
Dyed mulches are generally safe, but make sure they are certified by the Mulch & Soil Council. This ensures the dyes are vegetable-based and the wood used is not contaminated with harmful chemicals like arsenic.
4. Can I use fresh grass clippings as mulch?
Yes, but apply them in thin layers (less than an inch) at a time. If you pile fresh grass too high, it will mat together, smell bad, and create a waterproof barrier that prevents moisture from reaching the soil.
5. Should I remove old mulch before adding new?
Generally, no. As long as the old mulch is organic and decomposing, you can just add the new layer on top. However, if the old mulch has formed a hard, crusty barrier (fungal mat), break it up with a rake before adding new material.



