
Efficient Hydration: How to Automate Your Garden Like a Pro
There is a special kind of peace that comes with morning gardening—the smell of damp earth, the quiet hum of nature, and the sight of vibrant blooms. However, for many of us, that peace is often interrupted by the chore of dragging a heavy hose across the yard or standing for hours with a spray nozzle. If you have ever felt like an over-taxed radiator during a summer heatwave, it is time to change your approach. Getting started with drip irrigation beginners can often feel overwhelming due to the specialized parts and technical terms, but it is truly the gold standard for plant health. By transitioning to a dedicated watering system garden, you not only save hours of labor every week but also ensure that your plants receive deep, consistent hydration exactly where they need it most: at the roots.
Understanding the Basics of Drip Irrigation
What Exactly is Drip Irrigation?
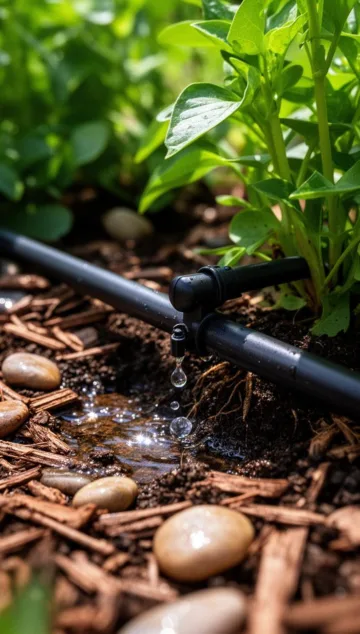
In the simplest terms, drip irrigation is a network of flexible tubes that deliver water slowly and directly to the soil. Unlike sprinklers that blast water into the air—where much of it evaporates before hitting the ground—drip systems use “emitters” to release water drop by drop. This method mimics a slow, soaking rain, which is the most effective way to hydrate plants without causing soil erosion or nutrient runoff.
How the Components Work Together
A standard setup starts at your outdoor faucet. From there, water flows through a pressure regulator (to prevent the tubes from popping) and a filter (to keep debris from clogging the small holes). The water then travels through a main supply line and exits through smaller “micro-tubing” or emitters placed near the base of each plant. It sounds technical, but it is essentially just a very smart, leaky hose.
Why Beginners Should Switch to Drip Systems
Precision and Efficiency
When you use a traditional hose, you often water the leaves along with the soil. Wet foliage is a magnet for fungal diseases like powdery mildew. A targeted system keeps the leaves dry and the roots wet. This precision also means you aren’t watering the empty spaces between plants, which significantly reduces the amount of weeds that pop up in your garden beds.
Consistent Soil Moisture
Most plants, especially vegetables like tomatoes and peppers, crave consistency. Fluctuating between “bone dry” and “flooded” stresses the plant and can lead to issues like blossom end rot. Drip systems allow you to maintain a steady level of moisture that encourages deep root growth and higher yields.
Step-by-Step Instructions for Installation
Setting up your first system doesn’t require a degree in plumbing. By following these steps for drip irrigation beginners, you can have a fully functional watering system garden up and running in a single afternoon.
Step 1: Map Out Your Garden
Sketch your garden beds and note the location of your water source. Measure the distance from the faucet to the furthest plant. This will help you determine how many feet of main tubing you need to purchase.
Step 2: Assemble the Head Assembly
Attach a multi-port timer to your faucet first (this allows you to automate the watering). Next, screw on a backflow preventer to protect your home’s drinking water, followed by a 25-PSI pressure regulator and a mesh filter. Finally, attach your tubing adapter.
Step 3: Lay the Main Line
Run 1/2-inch poly tubing along the length of your garden rows or around the perimeter of your raised beds. Use landscape staples to pin the tubing to the ground so it doesn’t shift. If the tubing is stiff, let it sit in the sun for 30 minutes to soften it up.
Step 4: Install Emitters and Micro-tubing
Use a specialized hole-punch tool to “tap” into the main 1/2-inch line. Insert a 1/4-inch barbed connector into the hole, attach a length of micro-tubing, and place an emitter at the end near the base of your plant. For closely spaced plants like lettuce, you can use “emitter tubing” which has holes pre-drilled every 6 or 12 inches.
Step 5: Flush and Cap
Before putting the end caps on your lines, turn the water on for a minute to flush out any dirt or plastic shavings that got inside during installation. Once the water runs clear, slide on an end clamp or “figure-eight” closure to seal the system.
Tips from Experienced Gardeners
Group Plants by Water Needs
Not all plants are created equal. Succulents and lavender prefer dry feet, while blueberries and hydrangeas are thirsty. When designing your layout, try to put plants with similar water requirements on the same “zone.” If you have a particularly thirsty plant in a line of drought-tolerant ones, simply add a second emitter to that specific plant to double its water intake.
Use a Smart Timer
The real magic happens when you add a timer. Modern Wi-Fi-enabled timers can even check the local weather forecast and skip a scheduled watering if it rained the night before. This level of automation ensures you never overwater, even when you’re away on vacation.
Common Mistakes to Avoid
Ignoring Pressure Regulation
Standard household water pressure is often too high for thin-walled drip tubing. Without a regulator, your emitters might fly off like tiny rockets, or your tubing might split. Always include a 25-PSI regulator in your assembly.
Skipping the Filter
Even if your tap water looks clean, tiny particles of minerals or sand can eventually clog the microscopic openings in your emitters. A simple mesh filter costs under $15 and will save you the headache of replacing clogged parts mid-season.
Over-tightening Connections
Most drip components are made of plastic and use rubber O-rings to create a seal. Hand-tight is usually sufficient. Using a heavy wrench can crack the plastic or crush the gaskets, leading to leaks.
Tools and Materials Needed
To build a basic starter system, you will generally need the following items:
- Backflow Preventer: Prevents garden water from siphoning back into your home.
- Pressure Regulator: Drops the PSI to a safe level for the tubes.
- 1/2-inch Poly Tubing: The “trunk” of your system.
- 1/4-inch Micro-tubing: The “branches” that lead to individual plants.
- Emitters: Rated by Gallons Per Hour (GPH). 1 GPH is standard for most garden plants.
- Hole Punch Tool: For making clean entries into the main line.
- End Caps: To seal the ends of your tubing runs.
- Landscape Staples: To keep everything tidy and in place.
Seasonal and Climate Considerations
Winterizing Your System
If you live in a climate where the ground freezes, you must winterize your system. Water left in the lines will expand as it freezes, causing the plastic to crack. Drain the lines, remove the timer and head assembly, and store them indoors until spring. You can use an air compressor to blow out any remaining moisture if your lines are buried.
Adjusting for Summer Heat
During the peak of July and August, your plants’ water demands will increase. Instead of watering more often, try watering for longer durations. This encourages roots to grow deeper into the cooler soil. Mulching over your drip lines with wood chips or straw will also prevent evaporation and keep the tubing protected from UV degradation.
Benefits of Using Drip Irrigation
The most immediate benefit is the reduction in water waste. Studies show that drip systems can be up to 90% efficient, compared to 50-70% for traditional sprinklers. Beyond the environmental impact, you will notice a significant improvement in plant vitality. Because the water is delivered slowly, the soil stays aerated rather than becoming compacted and “muddy.” This leads to stronger root systems and, ultimately, more flowers and vegetables for your table.
Alternative Methods
Soaker Hoses
Soaker hoses are porous tubes that “sweat” water along their entire length. They are easier to install than drip systems but are less precise and tend to degrade quickly in the sun. They are a good entry-point for very small, densely planted beds.
Self-Watering Containers
For patio gardeners, self-watering pots use a reservoir at the base and a wicking system to pull moisture up into the soil. While effective for small-scale gardening, they don’t offer the scalability of a full drip network.
Conclusion
Investing a bit of time into a high-quality hydration strategy is one of the best moves you can make for your garden’s future. For drip irrigation beginners, the initial setup is a rewarding project that pays for itself in just one season through reduced water bills and increased harvests. Once you have your watering system garden configured, you can get back to the parts of gardening you truly love—like harvesting, pruning, and simply enjoying the beauty of your outdoor space. Happy gardening!
Frequently Asked Questions
How long should I run my drip system?
It depends on your soil type. Sandy soil drains quickly and may need 30 minutes every day, while clay soil retains water and might only need an hour twice a week. Start with 30 minutes every other day and adjust based on the moisture level 2 inches below the surface.
Can I use drip irrigation for potted plants?
Yes! In fact, pots dry out much faster than the ground, making them perfect candidates for drip emitters. You can run micro-tubing up into each pot from a main line hidden behind the containers.
Do I need to bury the tubing?
You don’t have to bury it, and many gardeners prefer to leave it on the surface for easy maintenance. Covering the tubes with 2-3 inches of mulch is the best middle-ground; it hides the tubes and protects them from the sun while remaining accessible.
What happens if an emitter gets clogged?
If you notice a plant looking wilted, check the emitter. You can usually pull it out and soak it in vinegar to dissolve mineral buildup, or simply “pop” in a new one since they are very inexpensive.
Can I add liquid fertilizer to my drip system?
Yes, this is called “fertigation.” You can buy a fertilizer injector that attaches to your head assembly, allowing you to feed your plants automatically every time you water.



