
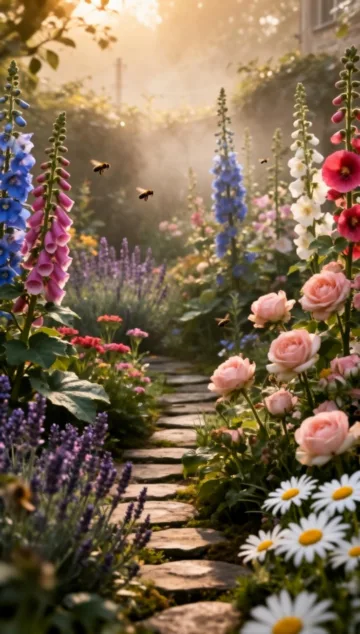
The Ultimate Guide to Creating a Romantic, Bloom-Filled Sanctuary
There is something undeniably magical about a garden that feels like it evolved naturally over time, spilling over with fragrance, color, and texture. Unlike formal landscapes with their strict lines and manicured hedges, the cottage style embraces a wonderful sense of organized chaos. It is a celebration of abundance, where every square inch is packed with life. If you have ever dreamed of walking through a gate into a sea of soft petals and hummingbees, choosing the right cottage garden plants is the first step toward making that dream a reality. By selecting a mix of hardy perennials and whimsical cottage garden flowers, you can create a low-maintenance yet high-impact space that looks like it belongs on the cover of a storybook.
The Foundations of Cottage Style
Embracing Informality
The core philosophy of this gardening style is “controlled wildness.” You don’t need a ruler or a level here. Instead of straight rows, think in terms of drifts and clusters. Let plants self-seed in the cracks of your walkways and allow climbing roses to scramble over fences. This “imperfect” look is exactly what gives the garden its charm and makes it much more forgiving for beginner gardeners than a formal landscape.
Function Meets Beauty
Historically, cottage gardens weren’t just for show; they were practical spaces where homeowners grew herbs, fruits, and medicine alongside their blooms. To capture this authentic feel, try mixing edible elements like kale with purple ruffled leaves or bright red strawberries into your flower beds. This creates a multi-sensory experience that is as functional as it is beautiful.
Essential Perennials for Lasting Color
The Majesty of Delphiniums and Foxgloves
To get that classic “wall of color” look, you need vertical interest. Delphiniums offer striking spires of true blue, a rarity in the plant world, while Foxgloves (Digitalis) provide a vintage woodland feel with their speckled bells. These plants act as the backbones of your borders, drawing the eye upward and providing a structural backdrop for shorter species.
Hardy Geraniums: The Unsung Heroes
Also known as “Cranesbill,” hardy geraniums are the ultimate fillers. They form dense mounds of foliage that suppress weeds and produce a profusion of small, delicate flowers in shades of blue, pink, and white. They are incredibly tough and can thrive in various light conditions, making them a staple for any collector of traditional flora.
Old-Fashioned Roses
No cottage-style space is complete without roses. However, skip the stiff hybrid teas and opt for shrub roses, climbing roses, or David Austin varieties. Look for “cabbage” styles with high petal counts and intense fragrances. These varieties drape elegantly over arbors and fill the evening air with scent.
Captivating Annuals and Self-Seeders
Sweet Peas and Cosmos
Annuals provide the “filler” and the concentrated color that keeps the garden looking lush throughout the summer. Sweet peas are essential for their scent and their ability to climb up trellises or pea sticks. Cosmos, with their feathery foliage and daisy-like blooms, are great for filling large gaps quickly and provide endless stems for indoor bouquets.
Poppies and Nigella
One of the joys of this gardening style is the element of surprise. Plants like Shirley Poppies and Nigella (Love-in-a-Mist) are excellent self-seeders. Once you plant them, they will drop seeds that sprout the following year, often in places you wouldn’t have thought to put them, adding to the naturalized aesthetic.
Step-by-Step Instructions: Planting Your Garden
Ready to get your hands dirty? Building a garden from scratch can feel overwhelming, but following a logical order ensures your cottage garden plants have the best start possible. Focus on soil health and layering to ensure you get that iconic dense look without overcrowding your cottage garden flowers too much in their first season.
Step 1: Prepare the Bed
Clear the area of grass and weeds. Dig in plenty of organic matter, such as well-rotted manure or garden compost. This style of gardening requires “hungry” plants to grow closely together, so the soil needs to be rich and moisture-retentive.
Step 2: Place Your “Anchors”
Start with your largest plants. Position your shrubs (like hydrangeas or roses) and your tallest perennials (like hollyhocks or delphiniums) first. Usually, these go toward the back of the border or in the center of an island bed.
Step 3: Layer the Mid-Height Blooms
Fill the middle ground with medium-sized plants like Peonies, Phlox, and Lupines. Try to plant in groups of three or five of the same variety; this helps the eye rest and prevents the garden from looking too cluttered or “bitty.”
Step 4: Soften the Edges
Finally, plant low-growing creepers like Alchemilla mollis (Lady’s Mantle) or Nepeta (Catmint) along the edges of your paths. These will grow over the hard edges of your walkways, softening the transition between the garden and the path.
Step 5: Mulch and Water
Apply a thick layer of bark or compost mulch to keep weeds down and moisture in. Water deeply and regularly until the plants are established.
Tips from Experienced Gardeners
- Deadhead Relentlessly: Removing faded flowers encourages the plant to put its energy into making more blooms rather than seeds. This is the secret to a garden that stays in flower from June until October.
- Support Tall Stems Early: Don’t wait for your delphiniums to flop over in a summer rainstorm. Place bamboo stakes or circular metal supports around tall plants in late spring while they are still small.
- Mix Your Textures: A garden of only round flowers can look flat. Mix spiky plants (Veronicastrum) with flat-topped flowers (Achillea) and rounded blooms (Peonies) to create visual depth.
Common Mistakes to Avoid
- Leaving Too Much Space: While most garden styles tell you to space things out, the cottage look depends on density. If you see bare soil, fill it with an annual or a groundcover.
- Using Plastic Mulch: Avoid landscape fabric or plastic. It prevents the self-seeding plants (which are vital for this style) from finding the soil. Stick to organic mulches.
- Neglecting Winter Structure: A cottage garden can look “messy” in winter. Include a few evergreens, like boxwood balls or yew pillars, to give the garden “bones” during the cold months.
Tools and Materials Needed
- Hand Trowel and Fork: For planting and weeding in tight spaces.
- High-Quality Pruners: Essential for deadheading and pruning roses.
- Garden Twine and Stakes: For supporting tall, heavy bloomers.
- Organic Compost: To enrich the soil every spring.
- A Slow-Release Fertilizer: To keep those heavy-blooming perennials fed throughout the summer.
Seasonal and Climate Considerations
Cottage gardens are remarkably adaptable, but they do best in temperate climates with distinct seasons. In hot, dry areas, focus on drought-tolerant choices like Lavender, Russian Sage, and Sea Holly. In cooler, wetter climates, Astrantia and various ferns will thrive in the damp corners. Remember that many classic plants like Peonies and Lilacs require a period of cold “chill hours” in the winter to bloom effectively the following spring.
Benefits of This Gardening Method
Beyond the undeniable beauty, this gardening style is a haven for biodiversity. The variety of heights and bloom shapes provides a constant buffet for pollinators like bees, butterflies, and hoverflies. Because the ground is so densely planted, once established, these gardens actually require less weeding than traditional beds because there is no room for weeds to take hold. It is also an incredibly personal form of gardening—there are no “wrong” plants, only the ones you love.
Alternative Methods: The Small-Space Cottage Garden
You don’t need an acre of land to enjoy this look. If you have a patio or a small balcony, you can create a “contained” cottage garden. Use large terracotta pots of varying heights. Plant a climbing rose in a large half-barrel and surround it with trailing lobelia and violas. The same principles of density and variety apply; you are simply shrinking the scale. This method also allows you to move plants around to ensure something is always in bloom near your seating area.
Conclusion
Creating a sprawling, romantic landscape is a journey of patience and discovery. By choosing a diverse range of cottage garden plants, you are setting the stage for a garden that feels alive and constantly evolving. Whether you are planting a single border or an entire front yard, focus on the joy of the process rather than perfection. Over time, your cottage garden flowers will mingle and weave together, creating a tapestry of color that reflects your personal style. Grab your spade, start with the basics, and watch as your outdoor space transforms into a lush, fragrant sanctuary that brings a little bit of magic to every day.
Frequently Asked Questions
1. Do cottage gardens take a lot of work?
Initially, yes, because you are planting densely. However, once established, the plants act as a living mulch, suppressing weeds and reducing the need for constant maintenance. Major tasks are usually limited to an annual “big chop” in late winter and regular deadheading in summer.
2. Can I grow these plants in the shade?
While many classic flowers like roses and lavender love full sun, you can create a “shade cottage garden” using Foxgloves, Bleeding Hearts (Dicentra), Hellebores, and Hostas. These provide the same lush, romantic feel but thrive in dappled light.
3. How do I stop my garden from looking like a mess?
The key is “structural anchors.” Repeating a specific plant (like a boxwood shrub or a specific color of Salvia) throughout the bed helps tie the various elements together, giving the eye a path to follow through the abundance.
4. Is it expensive to start?
It can be if you buy everything at once. To save money, buy young plants in 4-inch pots, start annuals from seed, and ask gardening friends for “divisions” of their perennials. Many cottage plants, like Hostas and Daylilies, need to be split every few years, and gardeners are usually happy to share.
5. When is the best time to start planting?
Spring and autumn are the ideal times. Planting in the spring gives the roots time to establish before the heat of summer, while autumn planting allows them to settle in during the rainy season before going dormant for winter.



