
How to Plan a Stunning Backyard Oasis: The Ultimate Guide for Beginners
Welcome to the World of Floral Artistry
There is something deeply restorative about stepping into a yard filled with vibrant colors, swaying stems, and the sweet scent of blooming petals. If you have ever looked at a professional landscape and wondered how they achieved such a balanced look, you are in the right place. Creating a flower garden design doesn’t require a degree in horticulture; it simply requires a bit of planning and a connection with the soil. Whether you have a sprawling backyard or a tiny corner plot, starting your first beginner flower garden is an exciting journey that transforms your outdoor space into a personal sanctuary. In this guide, we will break down the essential principles of layout, color theory, and plant selection to help you grow a garden that flourishes year after year.
Foundational Principles of Garden Layout
Understanding Your Site Conditions
Before you buy your first seed packet, you must evaluate your canvas. Light is the most critical factor. Observe your yard throughout the day: which areas get blasted by the afternoon sun, and which stay cool in the shadows? Most flowering plants require at least six hours of direct sunlight, but there are plenty of beautiful options for shade-dwellers like Hostas and Bleeding Hearts.
The Importance of Soil Health
Plants are only as healthy as the dirt they grow in. Most garden flowers prefer well-draining soil rich in organic matter. If your soil is heavy clay or too sandy, you can amend it with compost or aged manure. This “black gold” provides the nutrients necessary for vibrant blooms and strong root systems.
Scale and Proportion
A common mistake is making garden beds too small. Narrow strips of flowers often look cluttered. Instead, aim for beds that are at least 3 to 5 feet deep. This allow you to “layer” your plants, placing taller varieties in the back and shorter ones in the front, creating a sense of depth and abundance.
Choosing Your Color Palette and Style
Monochromatic vs. Polychromatic
Do you want a serene, all-white “moon garden,” or a riot of every color in the rainbow? A monochromatic garden uses different shades of a single color, creating a sophisticated and calming effect. A polychromatic garden is energetic and cheerful. If you’re unsure, try a complementary palette—using colors opposite each other on the color wheel, like purple and yellow, for a high-contrast look.
Formal vs. Informal Styles
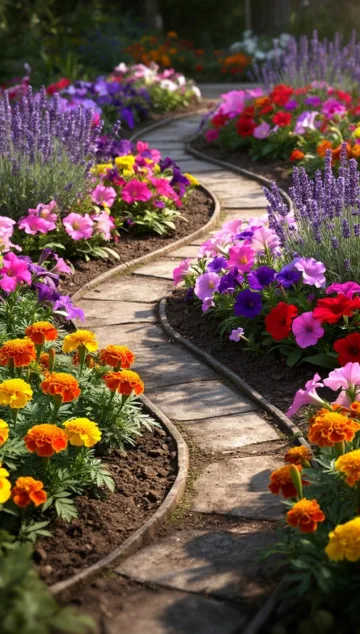
Formal gardens rely on straight lines, geometric shapes, and symmetry. They often feature clipped hedges and organized rows. Informal gardens, often called “cottage gardens,” embrace curves, overflowing borders, and a mix of heights. For most hobbyists, an informal style is more forgiving and easier to maintain.
Step-by-Step Instructions for Success
Creating a professional-looking landscape is a process of intentional steps. Follow this guide to ensure your flower garden design is both beautiful and sustainable for your first beginner flower garden:
Step 1: Define the Perimeter
Use a garden hose or a long rope to “draw” the shape of your garden bed on the grass. Curved lines often look more natural and inviting than sharp corners. Once you are happy with the shape, use a spade to edge the bed, removing the grass and weeds within the perimeter.
Step 2: Prepare the Earth
Turn the soil to a depth of about 12 inches. Mix in a 3-inch layer of organic compost. This is the best time to add any slow-release fertilizers that will help your new transplants get established.
Step 3: Arrange While in Pots
Before you dig any holes, set your potted plants out in the garden bed. This “practice run” allows you to see how the heights and colors work together. Remember to check the plant tags for “mature width” so you don’t crowd them; they might look small now, but they will grow!
Step 4: Plant and Water
Dig a hole twice as wide as the plant’s container. Gently loosen the roots if they are circling the pot. Place the plant in the hole at the same depth it was in the pot, fill with soil, and press down firmly. Water immediately to settle the air pockets around the roots.
Step 5: Mulch for Maintenance
Apply a 2-inch layer of wood chips or shredded bark over the soil. Mulch keeps moisture in, prevents weeds from sprouting, and gives the garden a finished, professional look.
Tips from Experienced Gardeners
Plant in Drifts
Instead of buying one of everything, buy three or five of the same plant and group them together. This creates “drifts” of color that are more impactful and easier for the eye to follow. It also makes the garden look more intentional and less chaotic.
Consider Bloom Time
The biggest challenge in gardening is ensuring something is always in bloom. When selecting plants, check their blooming schedule. Combine early-spring bulbs (like Tulips) with mid-summer perennials (like Coneflowers) and late-fall beauties (like Sedum or Asters).
The Power of Foliage
Flowers come and go, but leaves are there all season. Choose plants with interesting foliage textures—succulent leaves, silvery ferns, or variegated hostas—to keep the garden looking lush even when nothing is currently flowering.
Common Mistakes to Avoid
Ignoring Mature Size
It is tempting to pack plants close together for instant gratification. However, overcrowding leads to poor air circulation, which invites powdery mildew and pests. Always follow the spacing recommendations on the plant tag.
Forgetting the “Backbone”
A garden made entirely of annuals (plants that die after one year) requires a lot of work every spring. Incorporate perennials (plants that come back every year) and small shrubs to act as the “bones” of your garden. This provides structure even in the winter.
Overwatering or Underwatering
New plants need consistent moisture to establish roots. However, drowning them is just as bad as letting them dry out. Stick your finger an inch into the soil; if it feels dry, it’s time to water.
Tools and Materials Needed
To get started, you don’t need a shed full of expensive equipment. Most beginner projects can be completed with these basics:
- Pointed Shovel: For digging holes and removing sod.
- Hand Trowel: For precise planting in the garden bed.
- Pruning Shears: To “deadhead” (remove spent flowers) and trim stems.
- Garden Hose with Spray Nozzle: For gentle watering.
- Garden Gloves: To protect your hands from thorns and blisters.
- Organic Compost: To enrich the soil.
Seasonal and Climate Considerations
Hardiness Zones
Before buying plants, determine your USDA Plant Hardiness Zone. This tells you which plants can survive the winter in your specific area. A plant that thrives in Florida will likely perish during a Minnesota winter.
The Changing Seasons
In the spring, focus on cleaning up debris and adding mulch. In the heat of summer, your main job is watering and deadheading. In the fall, you can plant bulbs for next year and leave some seed heads standing to provide food for birds during the winter.
Benefits of Growing a Flower Garden
Beyond the obvious aesthetic appeal, flower gardening offers numerous advantages:
- Pollinator Support: You provide essential nectar for bees, butterflies, and hummingbirds.
- Mental Health: Gardening is a proven stress-reliever and a great way to practice mindfulness.
- Home Value: A well-maintained landscape can significantly increase the curb appeal and resale value of your property.
- Physical Activity: Planting, weeding, and mulching are excellent ways to stay active outdoors.
Alternative Methods: Raised Beds and Containers
If your soil is too rocky or you have limited space, consider these alternatives:
Raised Bed Gardening
Building wooden or corrugated metal frames allows you to fill them with perfect, store-bought soil. This sits above the ground, meaning less bending over and fewer weeds.
Container Gardening
If you only have a balcony or patio, you can still enjoy a floral paradise. Use large pots with drainage holes. Just remember that containers dry out faster than the ground, so you may need to water them more frequently during the height of summer.
Conclusion
Starting your journey into the world of horticulture is one of the most rewarding projects you can undertake. By understanding your environment, preparing your soil properly, and choosing plants that offer a variety of heights and bloom times, you can create a professional-grade flower garden design. Don’t be afraid to experiment, move plants around, and learn from your successes and failures. Your beginner flower garden is a living work of art that will evolve and grow more beautiful with every passing season. Grab your shovel, get your hands in the dirt, and enjoy the magical process of watching your vision come to life!
Frequently Asked Questions
1. How often should I fertilize my flowers?
Most perennials benefit from a feeding in early spring as new growth appears. Annuals, because they grow so fast, often appreciate a liquid fertilizer every 2–4 weeks during the blooming season.
2. What does “deadheading” mean?
Deadheading is the process of pinching or cutting off a flower once it has faded. This prevents the plant from putting energy into seed production and encourages it to produce more blooms instead.
3. Can I start a garden in the middle of summer?
Yes, but it is more challenging. Plants installed during high heat are subject to “transplant shock.” You will need to water them much more frequently (often twice a day) until they become established.
4. How do I keep pests like rabbits away?
Using physical barriers like small wire fences is most effective. You can also plant “deer-resistant” or “rabbit-resistant” flowers like Marigolds, Lavender, or Alliums, which have scents that many critters dislike.
5. Why are my plants turning yellow?
Yellow leaves can mean several things, but the most common causes are overwatering (root rot), underwatering, or a nitrogen deficiency in the soil. check the soil moisture first before adding any chemicals.



