
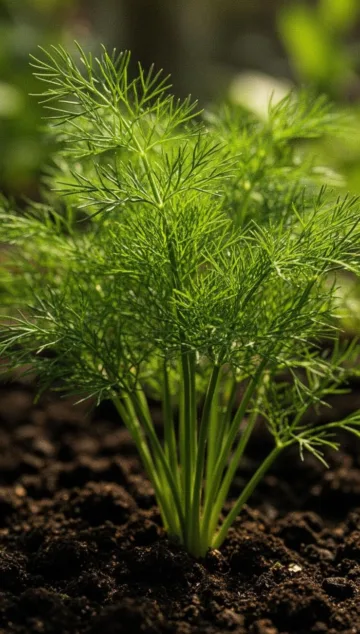
Delightful Dill: Your Guide to Growing This Fragrant Herb
Welcome to Your Dill Growing Adventure!
There’s something incredibly satisfying about stepping into your garden and plucking fresh herbs for your culinary creations. If you’re looking to add a touch of fresh, feathery green goodness to your kitchen and your garden space, then learning to grow dill is an excellent starting point. This versatile herb, with its delicate, fern-like foliage and distinctively sweet, slightly anise-like flavor, is a joy to cultivate. Whether you’re a seasoned green thumb or just dipping your toes into the wonderful world of gardening, this guide is designed to make growing dill a breeze. Imagine snipping fresh dill for your salads, pickling cucumbers, or flavoring a creamy sauce – it’s all within reach! Establishing a dedicated dill herb garden is not just about flavor; it’s about connecting with nature and enjoying the simple pleasure of growing your own food.
Why Grow Dill? The Benefits Unveiled
Before we dive into the “how,” let’s talk about the “why.” Dill isn’t just another pretty herb; it brings a lot to the table (literally and figuratively!).
A Culinary Star
The most obvious reason is its incredible flavor. Fresh dill adds a bright, fresh note that transforms dishes. It’s a staple in Scandinavian and Eastern European cuisines, but its uses are far-reaching. Think potato salads, creamy dips, grilled fish, and of course, that quintessential dill pickle!
Attracts Beneficial Insects
Dill flowers are like a buffet for pollinators! Bees, butterflies, and other beneficial insects are drawn to them. Even better, the flowers can attract predatory insects like lacewings and ladybugs, which help keep common garden pests like aphids in check. It’s a natural pest control system!
Easy to Grow
For beginners, dill is remarkably forgiving. It doesn’t demand a lot of fuss and will generally thrive with basic care. This makes it a perfect candidate for your first herb-growing endeavor.
Fast Growing
Unlike some herbs that take ages to establish, dill grows relatively quickly. You can often start harvesting its feathery leaves within 6-8 weeks of planting.
Medicinal Properties
Beyond its culinary uses, dill has been traditionally used for various medicinal purposes, including aiding digestion and soothing upset stomachs. While not a substitute for professional medical advice, it’s interesting to know your herb has a history of supporting well-being.
Getting Started: Planting Your Dill Seeds
Dill is primarily grown from seeds. It doesn’t transplant particularly well due to its taproot, so sowing directly into the ground where you want it to grow is usually the best approach. However, if you must start indoors, be very gentle when transplanting.
Choosing the Right Location
Dill loves sunshine! Find a spot in your garden that receives at least 6-8 hours of direct sunlight per day. It also prefers well-draining soil. If your soil is heavy clay, consider amending it with compost or other organic matter to improve drainage.
Soil Preparation
Loosen the soil to a depth of about 6-8 inches. Mix in a generous amount of compost. This will provide the nutrients dill needs and improve soil structure. While dill isn’t overly demanding, good soil makes a big difference.
Sowing Dill Seeds
You can sow dill seeds directly into the garden bed from early spring, once the soil has warmed up. In milder climates, you can often sow in early spring and again in late summer for a continuous harvest.
- Depth: Sow seeds about 1/4 inch deep.
- Spacing:
- For leaf harvest: Sow seeds about 1 inch apart. You can thin them later to 6-8 inches apart.
- For seed or flower harvest: Space plants about 12-18 inches apart.
- When to Sow: Sow in spring after the danger of frost has passed and the soil has warmed. For continuous harvests, sow every 2-3 weeks until mid-summer. In warmer climates, a fall planting is also an option.
Water the area gently after sowing. Keep the soil consistently moist until germination, which typically occurs within 7-14 days. Once the seedlings are a few inches tall, thin them to the recommended spacing.
Step-by-Step: How to Grow Dill
Ready to get your hands dirty? Here’s a straightforward guide to help you grow dill successfully and establish a flourishing dill herb garden.
Step 1: Select Your Seeds
Choose a dill variety that suits your needs. ‘Bouquet’ is a popular choice for both leaves and seeds. ‘Fernleaf’ is a more compact variety, excellent for containers or smaller spaces, and highly branched for more leaf production.
Step 2: Prepare Your Planting Area
As mentioned earlier, pick a sunny spot (6-8 hours of sun is ideal) with well-draining soil. Amend the soil with compost. If planting in containers, use a good quality potting mix.
Step 3: Sow the Seeds
Sow seeds about 1/4 inch deep, either directly in the garden or in pots. For leaves, sow densely and thin later. For seeds/flowers, space them out further.
Step 4: Water Consistently
Keep the soil moist, especially during germination. Once established, dill is somewhat drought-tolerant, but consistent moisture leads to the best growth and flavor.
Step 5: Thin Your Seedlings
Once seedlings are about 2-3 inches tall, thin them out. For leaf harvest, aim for plants about 6-8 inches apart. For seed/flower harvest, 12-18 inches apart is good.
Step 6: Fertilizing (Optional)
Dill doesn’t require heavy feeding. If your soil is rich in compost, you might not need to fertilize at all. If growth seems slow, a light application of a balanced liquid fertilizer or a top-dressing of compost can help.
Step 7: Harvesting
You can start harvesting leaves once the plants are about 6 inches tall. Snip the feathery fronds as needed. For seeds, let the plant flower and then harvest the seed heads when they turn brown and dry.
- For Leaves: Snip outer leaves first, or cut the entire plant back by about a third to keep it producing.
- For Seeds: Wait until the flower heads turn brown and dry. Cut the stems and hang them upside down in a paper bag to collect the mature seeds.
Step 8: Dealing with Bolting
Dill tends to “bolt” or go to seed quickly, especially in hot weather or when conditions are stressful. To prolong leaf production, try sowing seeds every few weeks, or choose slower-to-bolt varieties like ‘Fernleaf’. Sometimes removing flower stalks before they fully develop can encourage more leaf growth, but this also means no seeds!
Tips from Experienced Gardeners
Ready to cultivate your green thumb with dill? Here are some insider tips:
- Succession Planting: To ensure a continuous supply of fresh dill leaves, sow seeds every 2-3 weeks from spring through early summer.
- Companion Planting: Dill is a fantastic neighbor for many garden plants. It’s known to repel some pests and attract beneficial insects that can help other crops. Consider planting it near broccoli, cabbage, lettuce, cucumbers, and corn.
- Support Taller Varieties: Some dill varieties can grow quite tall and may become top-heavy, especially when flowering. A simple stake or cage can provide support.
- Harvesting Regularly: Frequent harvesting of the feathery leaves actually encourages the plant to produce more foliage. Don’t be shy!
- Saving Seeds: Don’t discard those flowers! Once they go to seed, you can collect them. Dried dill seeds are potent and great for pickling and other culinary uses.
Common Mistakes to Avoid When Growing Dill
Even the most enthusiastic gardener can make a few missteps. Here’s how to avoid common pitfalls:
- Transplanting Dilemma: Dill’s taproot makes it unhappy when moved. Sow seeds directly where you want the plant to grow. If you must start indoors, use biodegradable pots that can be planted directly into the ground to minimize root disturbance.
- Too Much Shade: Dill loves sun. A shady spot will result in leggy plants with less flavor. Aim for full sun.
- Overcrowding: Allowing seedlings to remain too close together will lead to weak plants that compete for resources. Thinning is crucial for healthy growth.
- Not Harvester Often Enough: While it seems counterintuitive, regular harvesting encourages more leaf production. If you let it just grow wild, it might bolt sooner.
- Ignoring the Bolt: If you see flowers forming and your goal is leaves, harvest aggressively before it goes to seed. However, if you want seeds, let it flower! Know your objective.
Tools or Materials Needed
Growing dill is pretty low-fuss, but having a few essentials on hand will make the process smoother:
- Dill seeds (of your chosen variety)
- Trowel or small shovel for soil preparation
- Watering can or hose with a gentle spray nozzle
- Compost or organic matter (if your soil needs enrichment)
- Labels/markers (to remember where you planted!)
- Scissors or herb snips for harvesting
- Potting mix and containers (if growing in pots)
- Stakes or small cages (optional, for supporting taller varieties)
Seasonal or Climate Considerations
Dill is a cool-season herb that prefers moderate temperatures. It doesn’t fare well in extreme heat or frost.
- Spring: The ideal time to sow dill seeds in most regions. Aim for after the last frost date.
- Summer: In hot climates, dill will likely bolt very quickly. Consider planting in a spot that gets some afternoon shade or using heat-tolerant varieties. Succession planting in early summer can provide fresh leaves until the heat really sets in.
- Fall: In many areas, a late summer sowing can provide a fall harvest of dill leaves.
- Overwintering: Dill is an annual and typically won’t survive a hard frost. However, in very mild climates, it might overwinter, or it may self-seed for the following year.
Benefits of This Gardening Method or Plant
Growing dill offers a bounty of benefits, both in your garden and in your kitchen.
- Culinary Versatility: From pickles to fish, dill is a flavorful herb that elevates countless dishes.
- Attracts Pollinators: The umbrella-shaped flowers are a magnet for bees and butterflies, supporting your local ecosystem.
- Natural Pest Deterrent/Attractor: It can help deter some pests while attracting beneficial insects that prey on aphid populations.
- Easy Seed Starting: Dill is one of the easier herbs to grow from seed, making it accessible for novice gardeners.
- Aesthetic Appeal: The feathery foliage adds a soft, textural element to garden beds and borders.
- Aromatherapy: The fresh scent of dill is lovely and can be quite refreshing.
Alternative Methods for Growing Dill
While direct sowing is the gold standard, here are a couple of alternatives:
- Container Growing: Dill thrives in pots! Simply use a container at least 8-10 inches deep with drainage holes. Use a good potting mix and ensure it gets plenty of sun. This is a great option for balconies, patios, or small gardens. Choose compact varieties like ‘Fernleaf’ for best results.
- Indoor Growing: You can grow dill indoors on a sunny windowsill, especially during cooler months. Use a bright south-facing window or supplement with a grow light. Keep the soil consistently moist and be prepared for plants to be a bit less robust than outdoor-grown dill.
Conclusion: Enjoy Your Fresh Dill!
From its delicate beauty to its vibrant flavor, dill is a rewarding herb to grow dill. By following these simple steps and tips, you can cultivate a bountiful harvest and add a fresh, aromatic touch to your meals. Whether you’re planting a dedicated dill herb garden or tucking a few plants amongst your vegetables and flowers, the joy of snipping your own homegrown dill is unmatched. Enjoy the process, savor the flavor, and happy gardening!
Frequently Asked Questions About Growing Dill
- Can I grow dill from cuttings?
No, dill is primarily grown from seeds. It does not readily root from cuttings like some other herbs. - Why is my dill going to seed so quickly?
Dill is prone to bolting, especially in hot weather, prolonged periods of drought, or when the plant is stressed. Sowing in cooler parts of the season and watering consistently can help prolong leafy growth. - How tall does dill get?
Dill can vary in height depending on the variety. Many common types like ‘Bouquet’ can reach 2-4 feet tall, while more compact varieties like ‘Fernleaf’ may only get to 1-2 feet. - Can I harvest dill leaves all at once?
Yes, you can cut the entire plant back by about one-third to half. It will regrow, but be aware that harvesting heavily can sometimes encourage it to bolt sooner. Harvesting outer leaves regularly is generally better for continuous production. - What’s the best way to store fresh dill?
To store fresh dill, you can wrap the stems in a damp paper towel and place them inside a plastic bag in the refrigerator. For longer storage, you can finely chop the dill, mix it with a little water or olive oil, and freeze it in ice cube trays.



