
The Ultimate Green Thumb Handbook: How to Cultivate a Bountiful Bean Harvest
Welcome to the Joy of Bean Gardening
There is nothing quite like the satisfaction of walking into your backyard and plucking a crisp, vibrant green bean straight from the vine. Whether you are a first-time gardener or looking to refine your backyard homestead, learning how to grow beans is one of the most rewarding projects you can undertake. Beans are incredibly versatile, fast-growing, and packed with nutrition, making them a staple in any organic garden. To ensure you get the most out of your soil, having a reliable bean planting guide at your side is essential for navigating the nuances of soil temperature, supports, and variety selection.
Types of Beans: Choosing Your Perfect Match
Before you dig into the dirt, you need to decide which type of bean fits your space and culinary needs. While there are hundreds of varieties, they generally fall into two growth habits.
Bush Beans: The Compact Choice
Bush beans grow in short, stocky clumps, usually reaching about two feet in height. They do not require any trellis or support, making them perfect for raised beds or small garden patches. They tend to produce their entire crop over a few weeks, which is ideal if you plan on canning or freezing your harvest all at once.
Pole Beans: The Vertical Climbers
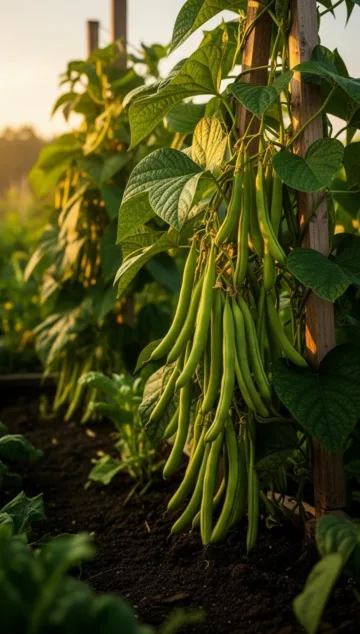
If you have limited ground space but plenty of vertical room, pole beans are your best friend. These vigorous climbers can reach ten feet or more. They require a sturdy trellis, teepee, or fence to grow upward. Unlike bush beans, they produce consistently throughout the entire summer until the first frost hits.
Snap, Shell, and Dry Beans
Consider how you want to eat them! Snap beans (like Blue Lake or Kentucky Wonder) are eaten pod-and-all. Shelling beans (like Edamame) are harvested when the seeds are plump but still soft. Dry beans (like Kidney or Black beans) stay on the vine until the pods turn brittle and the seeds inside are hard.
Preparing Your Garden for Success
Beans are relatively low-maintenance, but they do have a few “non-negotiables” when it comes to their environment. A little preparation goes a long way in preventing disease and maximizing your yield.
Sunlight and Soil Requirements
Beans are sun-worshippers. They need at least six to eight hours of direct sunlight daily. As for the soil, they prefer a well-draining environment with a neutral pH (around 6.0 to 7.0). Because beans are nitrogen-fixers—meaning they actually take nitrogen from the air and put it back into the soil—they don’t require heavy fertilization.
Temperature Matters
These are warm-season crops. Planting too early in cold, damp soil is the number one cause of seed rot. Wait until the soil temperature is consistently at least 60°F (15°C) and the danger of frost has completely passed.
Your Essential Step-by-Step Instructions
Follow these steps to turn a handful of seeds into a cascading wall of green. This bean planting guide simplifies the process so you can focus on the fun parts of gardening. When you decide to grow beans, timing and depth are the secrets to a 100% germination rate.
Step 1: Prep the Bed
Loosen the soil to a depth of about six inches using a garden fork. Mix in a light layer of compost. Avoid high-nitrogen fertilizers, as these will encourage the plant to grow lots of leaves but very few bean pods.
Step 2: Sowing the Seeds
Plant your seeds directly into the garden. Bush beans should be planted 1 inch deep and 2 to 3 inches apart. Pole beans should be planted about 1 inch deep, spaced 3 inches apart at the base of your support structure. If you are planting in rows, leave about 18 to 24 inches between rows to allow for airflow.
Step 3: Watering and Germination
Water the soil gently immediately after planting. You should see sprouts poking through the earth within 7 to 14 days. Keep the soil moist but never soggy during this period.
Step 4: Support and Mulching
For pole beans, ensure your trellis is in place at the time of planting so you don’t disturb the roots later. Once the plants are a few inches tall, apply a layer of straw or shredded leaves around the base to suppress weeds and retain moisture.
Tips from Experienced Gardeners
Over the years, seasoned horticulturalists have developed “hacks” to get the most out of their bean patches. One popular method is using a legume inoculant. This is a powder containing beneficial bacteria that you dust on the seeds before planting to help them fix nitrogen more efficiently. Another tip is to harvest frequently; the more you pick, the more the plant produces. If you leave mature pods on the plant, it signals to the bean that its job is done, and it will stop flowering.
Common Mistakes to Avoid
Even the best gardeners run into trouble. Avoid these common pitfalls to keep your plants healthy:
- Working in the garden when leaves are wet: Beans are prone to fungal diseases. Walking through or harvesting from wet bean plants can spread blight and anthracnose throughout your entire crop.
- Over-fertilizing: Too much nitrogen results in beautiful foliage but zero beans. Stick to compost.
- Planting too deep: Bean seeds are quite large, but if they are buried more than an inch and a half deep, they might run out of energy before they reach the surface.
Tools and Materials Needed
You don’t need a shed full of expensive equipment to get started. Here is the basic kit:
- High-quality seeds: Look for “Heirloom” for flavor or “Disease Resistant” varieties for ease.
- Garden fork or trowel: For loosening the soil.
- Mulch: Straw, wood chips, or dried grass clippings.
- Support structure: Bamboo stakes, cattle panels, or nylon netting (for pole varieties).
- Garden hose with a soaker attachment: To water at the base of the plant and keep the leaves dry.
Seasonal and Climate Considerations
Beans are sensitive to extreme weather. In very hot climates (regularly over 90°F), some beans may drop their blossoms without producing pods. If you live in a scorching area, consider providing midday shade with a light row cover. In cooler northern climates, choose “short-season” varieties that mature in 45 to 50 days to ensure you harvest before the autumn frost returns.
Benefits of Growing Your Own Beans
Why bother growing them when they are cheap at the store? First, the flavor of a homegrown bean is incomparable—sweet, snappy, and tender. Second, beans improve your garden’s health by adding nitrogen back into the earth, which benefits whatever you plant in that spot next year. Finally, they are a high-yield crop, meaning you get a lot of food for a very small investment of time and money.
Alternative Methods: Containers and Hydroponics
If you don’t have a yard, don’t worry! Bush beans thrive in containers. A five-gallon bucket can comfortably house two to three bush bean plants. Ensure the container has plenty of drainage holes. For the tech-savvy gardener, snap beans can also be grown in hydroponic systems using deep water culture (DWC), provided you monitor the pH levels closely and provide adequate LED lighting.
Conclusion
Starting a vegetable garden is a journey of discovery, and there is no better starting point than the humble bean. From the towering heights of a pole bean trellis to the tidy rows of a bush bean patch, these plants offer beauty, health, and a massive harvest. By following this bean planting guide, you have the framework to prepare your soil, choose the right variety, and avoid common mistakes. As you learn to grow beans, you’ll find that the process is just as rewarding as the delicious meals you’ll create with your harvest. Happy gardening!
Frequently Asked Questions
1. Do I need to soak bean seeds before planting?
While some gardeners soak beans for a few hours to speed up germination, it isn’t strictly necessary. In fact, soaking for too long (over 12 hours) can cause the seeds to crack or oxygen-starve the embryo. If your soil is moist and warm, they will sprout just fine on their own.
2. Why aren’t my bean plants producing any pods?
The two most common reasons are too much nitrogen fertilizer (lots of leaves, no flowers) or extreme heat. If the temperature stays above 90°F, the pollen can become sterile, causing the flowers to fall off. Usually, once the weather cools slightly, the plant will start producing again.
3. How can I tell when snap beans are ready to harvest?
Snap beans are ready when the pods are firm and about as thick as a pencil. You should be able to snap them in half cleanly. If you can see the individual beans bulging significantly inside the pod, they may be getting tough and stringy, so pick them immediately!
4. What are the best companion plants for beans?
Beans grow wonderfully alongside corn, cucumbers, and radishes. They also benefit from being planted near marigolds, which can help deter certain pests. Avoid planting them near onions or garlic, as these can stunted bean growth.
5. How do I deal with Mexican Bean Beetles?
These are the most common bean pests. They look like yellowish-orange ladybugs. The best way to manage them in a home garden is to check the undersides of leaves for their bright yellow eggs and crush them. You can also pick off the adult beetles by hand and drop them into a bucket of soapy water.



