
From Seed to Salad: The Ultimate Handbook for Vibrant Homegrown Peppers
Why You Should Add Bell Peppers to Your Garden This Year
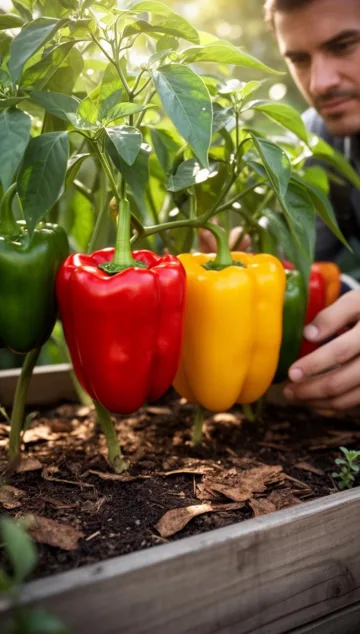
There is something undeniably satisfying about walking into your backyard and plucking a heavy, sun-warmed bell pepper straight from the vine. Whether they are deep emerald green, sunset orange, or brilliant red, these vegetables are the jewels of the summer garden. Many beginners feel intimidated by the long growing season, but once you understand their basic needs, it is surprisingly easy to grow bell peppers that outshine anything you can buy at the grocery store. Because these plants thrive in warmth and provide a high yield in small spaces, they are a staple for any home grower. By following a structured pepper planting guide, you can ensure your transition from a novice gardener to a pepper pro is smooth and successful.
Getting Started: Choosing the Right Varieties
One of the most exciting parts of gardening is the sheer variety available. Unlike the standard “Green Bell” in the supermarket, home gardeners can choose based on flavor profiles, wall thickness, and color.
Sweet vs. Specialty Bells
While we call them “bell” peppers, they come in various shapes. The ‘California Wonder’ is the classic blocky variety, but you might also consider the ‘Chocolate Bell’ for a deep mahogany hue or the ‘Candy Cane Red’ which features variegated foliage and striped fruits.
Disease-Resistant Hybrid Seeds
If you live in a humid climate, look for hybrid varieties labeled with resistance to “Tobacco Mosaic Virus” or “Bacterial Leaf Spot.” These hybrids are often more vigorous and easier for beginners to manage than some delicate heirloom types.
Ideal Growing Conditions
Bell peppers are tropical perennials grown as annuals in most climates. To get the best harvest, you need to mimic their native warm environment.
Sunlight Requirements
Peppers are sun-worshippers. They require at least 6 to 8 hours of direct sunlight daily. Without enough light, the plants will become “leggy” (tall and weak) and will produce fewer flowers.
Soil Quality and pH
Your soil should be well-draining and rich in organic matter. A slightly acidic to neutral pH (between 6.0 and 6.8) is perfect. Adding compost to your garden bed a few weeks before planting provides the slow-release nutrients these heavy feeders crave.
The Step-by-Step Instructions for Success
Starting your journey is all about timing. Because peppers have a long maturity date (often 70-90 days from transplanting), starting early is key.
Step 1: Starting Seeds Indoors
Begin your seeds about 8 to 10 weeks before the last expected frost. Use a high-quality seed-starting mix and keep the containers in a warm spot—ideally 75°F to 85°F. Using a seedling heat mat can drastically improve germination rates.
Step 2: Hardening Off
Before moving your babies outside, you must “harden them off.” This involves placing them outside in the shade for an hour, then gradually increasing their exposure to wind and sun over 7 to 10 days. This prevents transplant shock.
Step 3: Planting Day
When you are ready to grow bell peppers in their permanent home, wait until nighttime temperatures are consistently above 55°F. Dig a hole twice the width of the root ball. Space your plants 18 to 24 inches apart to allow for airflow. Referencing a reliable pepper planting guide during this stage ensures you don’t bury the stems too deep, which can lead to rot; keep them at the same level they were in their nursery pots.
Step 4: Consistent Watering
Peppers need a steady supply of moisture, but they hate “wet feet.” Aim for about an inch of water per week, watering at the base of the plant to keep the leaves dry and prevent fungal diseases.
Tips From Experienced Gardeners
Seasoned growers have a few “secret” tricks to boost yields and improve the health of their plants.
The Pinching Method
When your pepper plants are about 6 to 8 inches tall, consider pinching off the growing tip. This might feel scary, but it encourages the plant to grow bushier rather than taller, leading to more branches and, eventually, more fruit.
Using Epsom Salts
Some gardeners swear by a tablespoon of Epsom salts mixed into a gallon of water. Magnesium helps the plant take up nitrogen and phosphorus, leading to greener leaves and more robust peppers. Use this spray once a month during the early growing phase.
Staking Early
Bell peppers can become very heavy when loaded with fruit. Put your stakes or small tomato cages in at the time of planting. If you wait until the plant is large, you risk damaging the sensitive root system.
Common Mistakes to Avoid
Even with the best intentions, it is easy to make a few wrong turns. Here is what to watch out for:
- Planting too early: If the soil is cold, the plant will sit dormant and may never fully recover its vigor.
- Over-fertilizing with Nitrogen: High nitrogen leads to beautiful, lush green leaves but zero peppers. Once the plant starts flowering, switch to a fertilizer higher in phosphorus and potassium.
- Irregular watering: Drastic swings from bone-dry to soaking-wet soil can cause “Blossom End Rot,” where the bottom of the pepper turns black and mushy.
Tools and Materials Needed
To get started, you don’t need a professional farm, but a few basics will go a long way:
- High-quality seeds or starts: Select varieties suited for your zone.
- Hand trowel: For digging precise planting holes.
- Mulch: Straw or shredded leaves help retain soil moisture and suppress weeds.
- Tomato cages or bamboo stakes: To support the heavy fruit.
- Balanced fertilizer: Look for an N-P-K ratio like 5-10-10 or 10-10-10.
Seasonal and Climate Considerations
Your location dictates your pepper schedule. In the South, you may need to provide some afternoon shade during the scorching July heat to prevent “sunscald” on the peppers. In the North, use black plastic mulch to help warm the soil faster in the spring. If you have a short growing season, look for “early” varieties like ‘King of the North’ which produce fruit in fewer days.
Benefits of Growing Your Own Bell Peppers
Why go through the effort? First, the flavor of a homegrown pepper is significantly sweeter and more crisp than store-bought options. Second, you have total control over what pesticides (or lack thereof) are used on your food. Finally, bell peppers are incredibly high in Vitamin C and antioxidants, making them a powerhouse for your health.
Alternative Methods: Containers and Straw Bales
Don’t have a big backyard? No problem!
Container Gardening
Bell peppers are excellent candidates for pots. Ensure you use at least a 5-gallon container with plenty of drainage holes. Pots dry out faster than the ground, so you may need to water daily during the peak of summer.
Raised Beds
Raised beds allow for perfect soil control. Because the soil in raised beds warms up faster than the ground, you can often plant your peppers a week or two earlier, giving you a head start on the season.
Conclusion
Growing your own vegetables is a journey of patience and rewards. When you decide to grow bell peppers, you are setting yourself up for a summer filled with vibrant colors and fresh flavors. By sticking to a solid pepper planting guide and providing your plants with plenty of sun, consistent water, and a little bit of support, you will be amazed at the bounty you can produce. Remember to be patient during the early stages, keep an eye out for pests, and enjoy the process of watching your garden thrive. Happy planting!
Frequently Asked Questions
1. Why are my pepper plants flowering but not producing fruit?
This is often due to temperature stress. If day temperatures exceed 90°F or night temperatures stay above 75°F, the pollen can become sterile, causing the flowers to drop. Extreme cold (below 55°F) can have the same effect.
2. When is the best time to harvest bell peppers?
You can harvest them as soon as they reach a usable size. Green peppers are just unripe versions of the final color. If you leave them on the vine longer, they will change to red, yellow, or orange and become much sweeter.
3. Do I need two plants for pollination?
No. Bell peppers are self-pollinating. However, a gentle shake of the plant or the presence of bees can help move the pollen around within the flowers to ensure better fruit set.
4. What is eating holes in my pepper leaves?
Common culprits include aphids, slugs, or hornworms. Inspect the undersides of leaves regularly. Neem oil or insecticidal soap is usually effective for aphids, while hornworms should be picked off by hand.
5. Can I grow bell peppers indoors?
While possible, it is challenging because they require very high light intensity. You would need a strong LED grow light and a way to maintain warm temperatures and airflow to prevent mold.



