
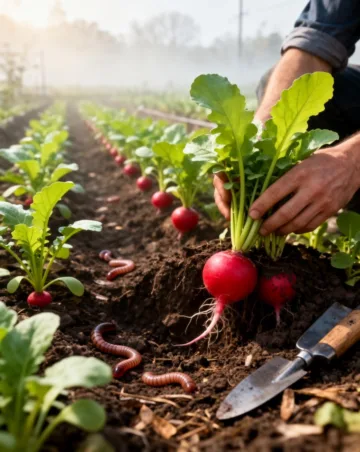
The Crunch Factor: Why Every Gardener Should Master the Art of Radishes
If you are looking for instant gratification in the garden, look no further than the humble radish. These peppery, crunchy root vegetables are often the very first thing a new gardener plants and the first thing they harvest. There is something incredibly rewarding about sowing a seed and seeing a full-grown vegetable ready for your salad bowl in as little as 25 days. Whether you have a sprawling backyard or just a few pots on a sunny balcony, growing radishes is an accessible and fun project for everyone. In this radish planting guide, we will explore the nuances of soil preparation, variety selection, and the simple secrets to ensuring your harvest is crisp and sweet rather than woody and over-bearingly spicy.
Choosing Your Radish Varieties
Spring vs. Winter Radishes
Not all radishes are created equal. They are generally categorized into two types based on their growing season. Spring radishes, like the popular ‘Cherry Belle’ or ‘French Breakfast’, are small and grow incredibly fast. They thrive in the cool transitions of spring and autumn. On the other hand, winter radishes, such as the ‘Daikon’ or ‘Black Spanish’, are much larger, take longer to mature, and are often planted in the late summer to be harvested as the weather turns cold.
Colorful Cultivars for Your Plate
Variety is the spice of life! Beyond the classic red globe, you can find ‘Watermelon’ radishes with a vibrant pink interior, ‘Easter Egg’ blends that provide a bouquet of purple, white, and red, and even slender white ‘Icicle’ radishes. Each variety offers a slightly different level of heat and texture, making them a versatile addition to any kitchen garden.
Preparing Your Garden Bed
Soil Texture and Quality
Radishes are root crops, which means their success depends entirely on what is happening underground. They prefer loose, well-draining soil. If your soil is heavy clay, the roots will struggle to expand, often resulting in stunted or misshapen bulbs. It is a good idea to work in some aged compost to improve the soil structure without over-fertilizing with nitrogen.
Sunlight and Spacing Requirements
To get the best results, place your radish patch in a spot that receives at least six hours of direct sunlight. While they can tolerate some partial shade, especially as the temperatures rise, full sun ensures the fastest growth. Since they are small plants, they are perfect for “intercropping”—planting them in the gaps between slower-growing vegetables like carrots or peppers.
Step-by-Step Instructions for Success
Following a structured radish planting guide ensures that you don’t miss the critical window for sowing and harvesting. When growing radishes, timing and depth are everything.
Step 1: Time Your Planting
Sow your first round of seeds about 4 to 6 weeks before the last average frost date in the spring. You can continue to sow seeds every 10 days (known as succession planting) until the daytime temperatures consistently hit 70°F (21°C).
Step 2: Sowing the Seeds
Plant your seeds about 1/2 inch deep. Space the seeds roughly 1 inch apart in rows that are 12 inches apart. If you are planting in containers, you can broadcast the seeds more densely and thin them out later. Cover the seeds lightly with soil and firm it down with your hand to ensure good seed-to-soil contact.
Step 3: Watering and Thinning
Water the area gently but thoroughly. Once the seedlings reach about 2 inches in height, it is time to thin them. This is a crucial step! Pull out the smaller plants so that the remaining radishes are spaced 2 to 3 inches apart. This gives the roots the room they need to bulb up properly.
Step 4: The Harvest
Check your radishes daily once they reach the “days to maturity” listed on the seed packet. For most spring varieties, this is around day 25 or 30. Simply pull one up to check the size. If it’s about an inch in diameter at the shoulder, it’s ready. Don’t leave them in the ground too long, or they will become “pithy” (tough and spongy).
Tips from Experienced Gardeners
The Importance of Consistent Moisture
The secret to a mild, crunchy radish is fast growth. To achieve this, the soil must remain consistently moist. If the soil dries out and then gets drenched, the radishes may crack. If they grow too slowly due to lack of water, they become incredibly spicy and woody. A light mulch of straw or dried grass clippings can help retain moisture.
Using the Whole Plant
Did you know radish leaves are edible? Many experienced gardeners use the young, tender greens in pestos or sautés. If you let a few plants go to seed in the heat of summer, they will produce edible seed pods that taste exactly like a crunchy radish but look like tiny green beans. These are delicious in stir-fries!
Common Mistakes to Avoid
Over-Fertilizing with Nitrogen
If you have beautiful, lush green tops but tiny, spindly roots, you likely have too much nitrogen in your soil. Nitrogen promotes leaf growth at the expense of root development. Use a balanced compost or a fertilizer higher in phosphorus to encourage the bulb to grow.
Planting Too Deep
Radish seeds are small. If you bury them too deep, the tiny sprout will run out of energy before it reaches the surface. Stick to the 1/2-inch rule for the best germination rates.
Waiting Too Long to Harvest
This is the most common mistake for beginners. A radish doesn’t get better as it gets bigger. In fact, the opposite is true. Harvest as soon as they reach a usable size to ensure the best flavor and texture.
Tools and Materials Needed
Essential Gardening Gear
You don’t need much to get started. A simple hand trowel for furrowing rows and a watering can with a “rose” attachment (to avoid washing away seeds) are the basics. A high-quality organic compost is also highly recommended to prep the bed.
Containers for Small Spaces
If you don’t have a garden bed, a wide, shallow pot (at least 6 inches deep) is perfect. Radishes have shallow root systems, making them one of the best veggies for container gardening on patios or windowsills.
Seasonal and Climate Considerations
Dealing with Summer Heat
Radishes are “cool-season” crops. When the temperature rises, the plant receives a biological signal to “bolt”—meaning it will quickly send up a flower stalk to produce seeds. Once a radish bolts, the root becomes hard and inedible. If you live in a warm climate, stick to early spring and late autumn plantings, or provide plenty of shade during the hottest part of the day.
Frost Tolerance
Radishes are surprisingly hardy. They can handle a light frost, and some gardeners claim that a bit of cold weather actually makes the roots taste sweeter. This makes them an excellent choice for “shoulder season” gardening in the early spring and late fall.
Benefits of Growing Radishes
A Great Entry Point for Kids
Because they grow so fast, radishes are the perfect plant for children. They get to see the results of their hard work almost immediately, which helps foster a love for gardening and nature.
Natural Soil Aerators
Varieties like the Daikon radish are often used as “tillage radishes.” Their long, powerful roots can punch through compacted soil, breaking it up and leaving behind organic matter as they decompose. This improves the soil health for the next crop you plant in that spot.
Alternative Methods: Microgreens and Sprouts
Radish Microgreens
If you don’t have the patience to wait 25 days, you can grow radish microgreens! Sow the seeds very thickly in a tray of potting mix and harvest them with scissors when the first set of true leaves appears (usually within 7-10 days). They have an intense radish flavor and are packed with nutrients.
Sprouting Seeds
You can also grow radish sprouts in a glass jar in your kitchen. This requires no soil at all—just water and a mesh lid. It’s a great way to have fresh, spicy greens in the middle of winter when the outdoor garden is dormant.
Conclusion
In the world of gardening, few things are as reliable and satisfying as growing radishes. From the first pop of green through the soil to the satisfying crunch of a fresh harvest, they offer a quick win for gardeners of all skill levels. By choosing the right varieties and following a consistent radish planting guide, you can enjoy multiple harvests throughout the year. Remember to keep your soil moist, thin your seedlings early, and harvest promptly to ensure the best flavor. Whether you’re adding them to a salad, pickling them for a taco topping, or eating them sliced thin with a bit of butter and salt, homegrown radishes are a true treat. Happy planting!
Frequently Asked Questions
How many radishes do I get from one seed?
Each seed produces exactly one radish root. This is why succession planting (sowing new seeds every week or two) is so important if you want a continuous supply throughout the season.
Why are my radishes so spicy?
Radishes develop a strong, hot flavor when they grow too slowly or are stressed by heat. To keep them mild, ensure they have plenty of water and are grown during the cooler months of the year.
Can I grow radishes indoors?
Yes! As long as you have a very sunny windowsill or a grow light, radishes can thrive indoors in pots. Ensure the room isn’t too hot, as they still prefer cooler air temperatures.
Why didn’t my radishes form bulbs?
The most common reasons are overcrowding (not thinning the seedlings) or too much nitrogen in the soil. Make sure each radish has at least 2 inches of space to expand.
Are radish pods edible?
Yes! If your radishes “bolt” and flower, they will eventually produce small green seed pods. These are crunchy, spicy, and delicious in salads or as a snack straight from the garden.



