
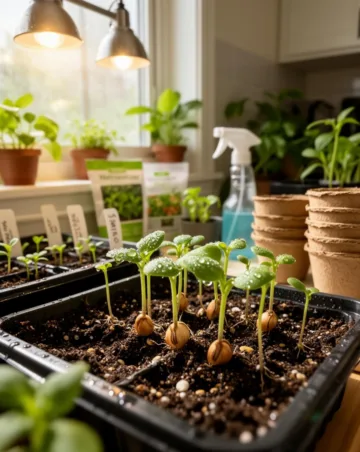
Ready to get a jump‑start on the growing season? Discover the simple steps that let you nurture strong seedlings from the comfort of your home, so you can transplant thriving plants into the garden when the weather finally cooperates.
Opening Section
Imagine opening your window to a tray of vibrant green sprouts before the first frost melts. That early advantage can turn a modest garden into a lush oasis. In this article you’ll learn how to get started with starting seeds indoors and master the art of indoor seed starting. Whether you have a sunny windowsill, a grow‑light rig, or just a spare cabinet, the basics remain the same.
Why Grow From Seed Inside?
Extended Growing Season
By beginning seed growth inside, you add weeks—sometimes months—to the natural growing window. This is especially valuable in cooler climates where the frost line arrives early.
Better Control Over Conditions
Inside, you can regulate temperature, moisture, and light more precisely than in an outdoor seed bed. This reduces the risk of sudden temperature shocks, which are a common cause of weak seedlings.
Cost‑Effective and Flexible
Seeds are far cheaper than transplants, and you can start a wide variety of vegetables, herbs, and flowers without waiting for nursery stock.
Essential Supplies for Successful Seed Starting
Containers
-
- Seed trays, peat pots, or recycled egg cartons.
-
- Ensure they have drainage holes to avoid waterlogged roots.
Growing Medium
-
- A light, sterile seed‑starting mix (often peat‑based or coconut coir).
-
- Avoid garden soil, which can harbor pathogens.
Light Sources
-
- South‑facing windows can work for hardy herbs.
-
- Fluorescent or LED grow lights are ideal for consistent 12–16 hours of light.
Temperature Management
-
- Most seeds germinate best at 65–75 °F (18–24 °C).
-
- Use a seed‑ling heat mat for cooler homes.
Step‑by‑Step Instructions
Follow these precise actions to master starting seeds indoors and achieve reliable indoor seed starting results.
1. Prepare Your Workspace
Lay out trays, labels, a clean water source, and a timer for lights. A tidy area reduces the chance of contaminating the seed mix.
2. Fill Containers
Moisten the seed‑starting mix until it feels like a wrung‑out sponge. Fill each cell no deeper than ½ inch (1.3 cm) for small seeds, or 1–2 inches (2.5–5 cm) for larger ones.
3. Sow the Seeds
Place seeds on the surface, then cover lightly with mix or a thin layer of vermiculite. Follow the seed packet for spacing and depth.
4. Water Gently
Use a misting bottle or a fine‑spray nozzle. Keep the medium consistently moist but never soggy.
5. Provide Light
Turn on grow lights within a few hours of sowing. Position lights 2–4 inches (5–10 cm) above the seedlings and adjust as they grow.
6. Monitor Temperature
Maintain the recommended range and avoid drafts. If using a heat mat, set it to the lower end of the range to prevent overheating.
7. Harden Off
About 7–10 days before transplant, move seedlings outdoors for increasing periods each day. This acclimates them to outdoor conditions.
8. Transplant
When seedlings have two true leaves and the risk of frost has passed, gently lift them with a small spoon or transplant tool and plant them in the prepared garden bed.
Tips from Experienced Gardeners
-
- Label Everything: Use waterproof tags—mistakes like mixing up lettuce and kale can be costly.
-
- Rotate Trays: Turn trays 180° daily to prevent uneven growth caused by light direction.
-
- Use a Fan: A gentle breeze strengthens stems, reducing the need for later staking.
-
- Start Small: Begin with easy‑to‑grow crops like radish, basil, or marigold before tackling more demanding species.
Common Mistakes to Avoid
-
- Overwatering: Waterlogged soil invites damping‑off disease.
-
- Insufficient Light: Leggy seedlings stretched toward the window need more artificial light.
-
- Planting Too Deep: Seeds buried beyond their recommended depth struggle to emerge.
-
- Ignoring Temperature Fluctuations: Sudden cold snaps can halt germination.
Tools or Materials Needed
-
- Seed trays or biodegradable pots
-
- Sterile seed‑starting mix
-
- Grow lights (LED or fluorescent)
-
- Heat mat (optional)
-
- Thermometer and hygrometer
-
- Label markers
-
- Misting bottle or fine spray nozzle
Seasonal or Climate Considerations
Cool‑Temperate Regions
Begin seed sowing 8–10 weeks before the last expected frost. Use heat mats to compensate for low ambient temperatures.
Warm‑Temperate and Subtropical Zones
Start seeds later (4–6 weeks before transplant) to avoid excessive heat that can cause seedlings to bolt.
Indoor Growing Year‑Round
With proper lighting, you can sustain a continuous cycle of seedlings—perfect for fresh herbs during winter.
Benefits of This Gardening Method
-
- Higher Yield: Stronger plants produce more fruit or flowers.
-
- Variety Expansion: Access rare or heirloom varieties not available as transplants.
-
- Early Harvest: Starting early lets you pick first crops weeks before neighbors.
-
- Educational Value: Perfect for kids to learn plant life cycles.
Alternative Methods
Direct Sowing Outdoors
Best for fast‑germinating crops like beans, peas, and cucumbers when soil temperature is consistently above 50 °F (10 °C).
Using a Propagation Tray with Soil‑Free Media
Rockwool cubes or peat pellets can reduce transplant shock, though they require careful handling.
Hydroponic Seed Starting
Grows seedlings in nutrient‑rich water solutions—ideal for space‑limited growers but requires more equipment.
Conclusion
Mastering starting seeds indoors opens the door to a more productive, flexible garden and gives you the confidence to experiment with new varieties. By following the proven steps for effective indoor seed starting, you’ll enjoy robust seedlings ready for a successful transplant, no matter your climate or experience level.
Frequently Asked Questions
1. How long does it take for seeds to germinate indoors?
Germination time varies by species; most vegetables sprout within 5‑10 days, while some herbs may take 14‑21 days.
2. Can I reuse seed‑starting mix from one batch to the next?
It’s not recommended because the mix can become compacted and may harbor pathogens. Fresh mix ensures better aeration and disease resistance.
3. Do I need a separate light source for every tray?
No. One well‑positioned grow light can cover multiple trays as long as the light intensity is sufficient (about 2000‑3000 lux for most seedlings).
4. When should I transplant seedlings to the garden?
Transplant when seedlings have at least two true leaves and the outdoor temperature stays consistently above the minimum for the specific crop (usually 50‑55 °F /10‑13 °C).
5. Is it okay to start seeds in a regular kitchen window?
Yes, if the window receives 6‑8 hours of direct sunlight. For lower‑light windows, supplement with a grow light to prevent weak, leggy growth.



