
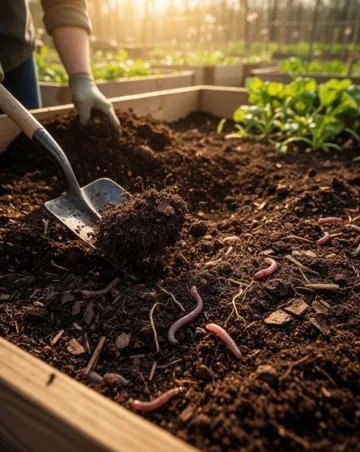
Welcome to the season of fresh seedlings, vibrant colors, and the sweet smell of earth after a gentle rain. If you’re eager to watch your garden burst into life this spring, the foundation of any thriving plant bed lies beneath the surface: the soil. Mastering the art of prepare soil for spring garden will set you up for a bounty of blossoms and vegetables, even if you’re just starting out.
Why waste time guessing why some plants thrive while others wilt? Understanding the basics of soil health is the secret weapon for every gardener, from the backyard hobbyist to the community plot caretaker. In this article you’ll learn how to turn a tired patch of earth into fertile ground, using proven garden soil preparation techniques that are simple, affordable, and effective. Let’s dig in!
Understanding Your Soil
What Makes Good Soil?
-
- Texture: the balance of sand, silt, and clay determines drainage and aeration.
-
- Structure: crumbly aggregates allow roots to grow freely.
-
- Organic Matter: compost and humus improve nutrient retention.
-
- pH Level: most vegetables prefer a slightly acidic to neutral range (6.0‑7.0).
Testing Your Soil
Before you add anything, grab a simple soil test kit (available at garden centers) or send a sample to your local extension office. The results will tell you:
-
- pH value
-
- Nitrogen, phosphorus, potassium levels
-
- Texture composition
Record the numbers – they’ll guide your amendment choices.
Preparing the Bed
Clearing the Area
Remove all weeds, rocks, and debris. For stubborn perennials, gently dig them out to avoid tearing roots. This creates a clean canvas for your upcoming soil work.
Loosening the Soil
Use a garden fork or a broad‑blade spade to turn the soil to a depth of about 12‑18 inches. This breaks up compacted layers and improves aeration.
Step‑By‑Step Instructions
Follow this systematic routine to prepare soil for spring garden and achieve optimal garden soil preparation results:
-
- Assess and Amend pH: If the test shows acidity beyond 6.0, spread lime according to the package directions. For alkaline soil, incorporate elemental sulfur.
-
- Enrich with Organic Matter: Add 2‑3 inches of well‑rotted compost or leaf mold. Work it evenly into the top 12 inches of soil.
-
- Incorporate Balanced Fertilizer: Choose a slow‑release fertilizer with an N‑P‑K ratio of 10‑10‑10 or similar. Sprinkle according to the recommended rate for your bed size.
-
- Improve Drainage: If your soil feels heavy, mix in coarse sand or perlite (about 10% by volume). This prevents waterlogging during spring rains.
-
- Level the Bed: Rake the surface smooth, creating a gentle slope away from structures to aid runoff.
-
- Water Lightly: Give the freshly prepared bed a few inches of water to settle the amendments and start the microbial activity.
Tips from Experienced Gardeners
-
- Microbial Boost: Sprinkle a handful of garden compost tea after your amendments to jump‑start beneficial microbes.
-
- Cover Crops: Plant a quick‑growing legume (like clover) a few weeks before your main planting. It adds nitrogen and prevents erosion.
-
- Mulch Early: A thin layer of straw or shredded bark conserves moisture and keeps the soil temperature steady.
Common Mistakes to Avoid
-
- Over‑compacting the soil after amendment – use light tamping only.
-
- Adding too much fertilizer at once – can burn seedlings.
-
- Ignoring soil testing – leads to misguided amendments.
-
- Planting too early before the soil warms – wait until night temperatures are consistently above 50°F (10°C).
Tools or Materials Needed
-
- Garden fork or broad‑blade spade
-
- Rake (leaf or garden)
-
- Soil test kit or pH meter
-
- Compost (2‑3 inches depth)
-
- Lime or elemental sulfur (pH adjustment)
-
- Slow‑release balanced fertilizer
-
- Sand or perlite (optional for drainage)
-
- Watering hose or sprinkler
Seasonal or Climate Considerations
Different regions demand slight tweaks:
-
- Cool‑climate zones: Focus on warming the soil early with black plastic mulch for a week before planting.
-
- Warm‑climate zones: Prioritize drainage; add extra sand or organic matter to prevent compacted, water‑logged beds.
-
- Rain‑heavy areas: Incorporate more organic matter and coarse textures to improve infiltration.
-
- Drought‑prone regions: Use a higher proportion of compost and mulch to retain moisture.
Benefits of This Gardening Method
When you invest time in thorough soil preparation, you’ll notice:
-
- Stronger root development and plant vigor.
-
- Higher yields of vegetables and more abundant flower displays.
-
- Reduced need for chemical interventions later in the season.
-
- Improved resilience against pests and diseases.
Alternative Methods
If you’re short on time or space, consider these options:
-
- Raised beds: Fill with a pre‑mixed blend of compost, peat, and vermiculite for immediate fertility.
-
- Container gardening: Use high‑quality potting soil which already contains balanced nutrients.
-
- No‑till gardening: Lay down a thick sheet of cardboard, top it with mulch, and let nature do the work—ideal for woodland‑style gardens.
Conclusion
Creating a thriving spring garden starts with the soil beneath your feet. By following the steps outlined above, you’ll successfully prepare soil for spring garden while mastering the art of garden soil preparation. Remember, healthy soil leads to healthy plants, and healthy plants create the beautiful, rewarding garden you’ve imagined. Happy planting!
Frequently Asked Questions
- How early should I start soil preparation before planting?
Begin at least 4‑6 weeks before your intended planting date. This gives amendments time to integrate and soil microbes to become active. - Can I use garden waste as compost?
Yes, as long as it’s free of pesticides and disease. Mature, fully decomposed material works best. - What if my soil test shows low phosphorus?
Incorporate bone meal or rock phosphate at the recommended rate. Pair with organic matter to improve availability. - Do I need to re‑test the soil each year?
It’s a good habit to test annually, especially if you rotate crops or add new amendments. - Is mulching necessary for spring planting?
While not mandatory, mulching helps retain moisture, suppresses weeds, and stabilizes soil temperature—benefits that boost early growth.



