
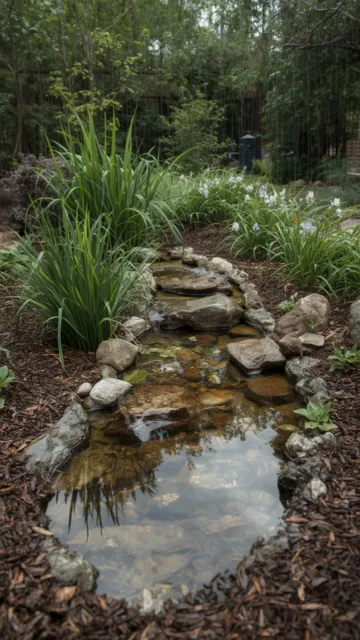
Ever wonder what to do with those soggy patches that form after a heavy rain? A rain garden offers a simple, attractive solution that not only solves drainage problems but also adds a burst of color and wildlife to your yard. By designing a small, planted depression that captures runoff, you’re essentially building a miniature stormwater garden, drainage garden that works with nature instead of fighting it. Whether you have a busy city lot or a suburban backyard, this technique is easy to master and brings immediate environmental benefits.
Understanding How It Works
What Is a Water‑Capture Garden?
A water‑capture garden is a shallow basin filled with specially chosen plants that can tolerate both wet and dry conditions. When rain falls, water flows into the basin, slows down, and slowly infiltrates into the soil, reducing runoff and erosion.
Why It Helps the Environment
-
- Filters pollutants like fertilizers and oil before they reach streams.
-
- Recharges groundwater by allowing water to soak into the soil.
-
- Provides habitat for pollinators, amphibians, and beneficial insects.
Design Principles for a Successful Garden
Location Selection
Choose a spot that receives runoff from roofs, driveways, or patios. Ideally, the area should be 5–10 feet away from foundations to avoid water infiltration problems.
Size and Shape
A good rule of thumb is to make the garden about 20% of the total impervious surface area. For a typical 1,200‑sq‑ft roof, a 240‑sq‑ft garden works well. Shape can be as simple as a rectangle or a more natural curve that blends with the landscape.
Soil Mix
Use a blend of native soil, sand, and organic compost (about 50% sand, 30% soil, 20% compost). This mixture promotes quick drainage while retaining enough moisture for plant roots.
Step‑by‑Step Instructions
Follow these eight steps to build your own rain garden and turn it into a functional stormwater garden, drainage garden that looks great all year round.
-
- Plan the Layout: Sketch the garden on graph paper, marking where water will flow in and out.
-
- Mark the Perimeter: Use a hose or spray paint to outline the shape on the ground.
-
- Excavate the Basin: Dig to a depth of 6–12 inches, creating a gentle slope (about 2% grade) toward the outlet.
-
- Install a Gravel Base: Spread a 2‑inch layer of washed gravel for drainage.
-
- Add the Soil Mix: Fill the basin with your prepared soil‑sand‑compost blend, tamping gently.
-
- Plant Selection: Choose moisture‑loving plants for the center and drought‑tolerant ones for the edges.
-
- Mulch Carefully: Apply a 1‑inch layer of shredded bark or leaf mold, keeping mulch away from plant crowns.
-
- Test and Adjust: Simulate a rain event with a garden hose; watch how water collects and make minor grading tweaks if needed.
Tips from Experienced Gardeners
-
- Plant in groups of three or more to create a cohesive look and improve pollinator attraction.
-
- Use native species whenever possible; they’re adapted to local climate and require less maintenance.
-
- Consider adding a shallow berm on the downhill side to slow water before it leaves the garden.
-
- Water new plantings deeply for the first few weeks to establish strong roots.
Common Mistakes to Avoid
-
- Over‑digging: Too deep a basin can become a permanent pond and drown plants.
-
- Improper Soil: Heavy clay retains water; sandy loam is best for quick infiltration.
-
- Planting the Wrong Species: Selecting only water‑loving plants will lead to a soggy, unhealthy garden during dry spells.
-
- Neglecting Maintenance: Letting weeds take over reduces the garden’s capacity to absorb water.
Tools or Materials Needed
-
- Shovel and spade
-
- Garden hose with spray nozzle
-
- Measuring tape and level
-
- Wheelbarrow for soil mix
-
- Landscape fabric (optional, for weed control)
-
- Gravel, sand, compost
-
- Native plants and mulch
Seasonal or Climate Considerations
In colder regions, deep freeze can turn the garden into an icy basin. To mitigate, add extra drainage pipes or keep the garden shallow. In hot, arid zones, increase the proportion of sand in the soil mix and select more drought‑tolerant plants such as Salvia and Lavandula.
Benefits of This Gardening Method
-
- Reduced Flooding: Captures runoff before it overwhelms streets or storm drains.
-
- Improved Water Quality: Plants filter nutrients and sediments.
-
- Enhanced Aesthetics: Adds a focal point of color and texture.
-
- Wildlife Support: Provides food and shelter for bees, butterflies, and amphibians.
-
- Cost Savings: Less reliance on expensive drainage systems.
Alternative Methods
If space or soil conditions limit a traditional garden, consider these alternatives:
-
- Rain Barrels: Collect roof runoff for later use in irrigation.
-
- Permeable Pavers: Allow water to seep through driveways and patios.
-
- Swales: Shallow, vegetated channels that guide water across a slope.
Conclusion
Building a rain garden is a rewarding project that transforms excess water into a vibrant, functional landscape feature. By following the steps outlined above, you’ll create a resilient stormwater garden, drainage garden that benefits both your property and the environment. Start small, observe how the water moves, and let the garden evolve with the seasons—your backyard will thank you.
Frequently Asked Questions
1. How large should my garden be?
Make it about 20% of the impervious surface that drains into it. For a 500‑sq‑ft patio, a 100‑sq‑ft garden works well.
2. Can I install a rain garden on a slope?
Yes, but keep the slope gentle (no more than 5%). Use terraces or a series of small basins to slow the flow.
3. What plants are best for the deepest part of the garden?
Moisture‑loving natives such as Swamp Milkweed (Asclepias incarnata), Cardinal Flower (Lobelia cardinalis), and Blue Flag Iris (Iris versicolor) thrive in wetter zones.
4. How often do I need to maintain it?
Weed once a month, mulch annually, and replace any dead plants in the first two seasons to ensure proper function.
5. Will a rain garden attract pests?
It can attract beneficial insects and amphibians, which actually help control pests. Proper plant selection and regular maintenance keep unwanted pests at bay.



